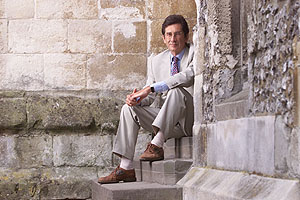
 It’s quite often the case that the available light looks great, but that there just isn’t enough of it. The trick here is to use flash to supplement the ambient light without replacing it. When you have the headmaster of one of the world’s oldest and grandest schools it isn’t difficult to choose a location in which to make his portrait.
After a very quick stroll around the fourteenth century buildings we settled on this well worn flight of steps to shoot the pictures. There was no sunlight on the scene, what light there was had been reflected from a nearby pale stone building so it was nicely diffused whilst still directional. Unfortunately this gave a 200 ISO light reading of 1/45th of a second at f2.8. This is simply not enough to guarantee sharp images so I decided to supplement that small level of ambient light with flash.
The available light was coming from my left so I decided that a softbox would best replicate the quality of light that was there. I have a two foot (60cm) x three foot (90cm) Chimera softbox so I fitted it to a Lumedyne head and placed it on a lighting stand about six feet to the subject’s right at about 20 degrees above his eye level. (more…)
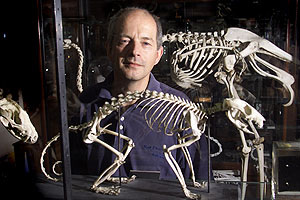 Having glass or any reflective surface in a photograph normally strikes fear into the heart of most photographers. This portrait has at least ten panes of glass in shot, but careful lighting and liberal use of the LCD screen on my digital camera made the glass nearly invisible.
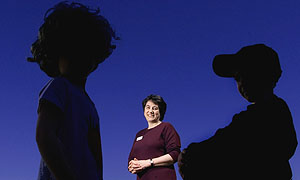 This is going over old ground somewhat, but I think that given a second and third example of techniques discussed before and combined here you start to get a deeper understanding of how various techniques can be intertwined.
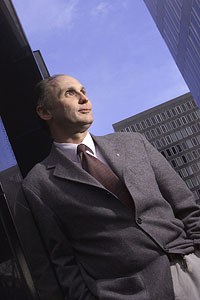 Sometimes you have no other option than to get your flash unit out of it’s hot shoe and make it perform like a studio style strobe. Whether it’s the Canon 550ex, the Nikon SB28DX or another make altogether there are some simple steps you can take to produce cultured and interesting images.
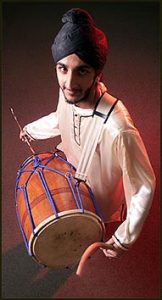 When you have just spent three hours driving to a job going over what the picture editor and the designer said to you about the pictures that were required it is inevitable that you start to make some plans. This job was certainly such an occasion.

 The way that an image is destined to be used dictates how you shoot it. This example talks about the difference in approach to shooting what is essentially the same subject, but for two different uses. I went to this southwest London school to shoot a “fly on the wall” documentary article about a music project to fill a couple of pages in a tabloid sized magazine.
 The “Interview Portrait” is one of the most difficult tasks that I am asked to undertake. Of course it’s easy enough to just turn up and shoot a picture, but actually making a proper portrait is a really difficult task. This portrait was frame 64 out of 73, frames 1- 30 were the safe shots and 31 – 73 were far more experimental.
 This classroom shot was made for a story about inner city schools performing well academically. It needed to stand out from other school images and the light in the room was poor. There were also a dozen adults in the room – all of whom I needed to keep from my picture.