Every time I post one of my old technique examples I get a massive spike in the visitor figures for this blog. Despite some of them being fifteen or more years old they still seem to attract quite a bit of attention. This one is being re-posted after a specific request from a reader and I’ve added a second photograph at the bottom for a little ‘added value’.

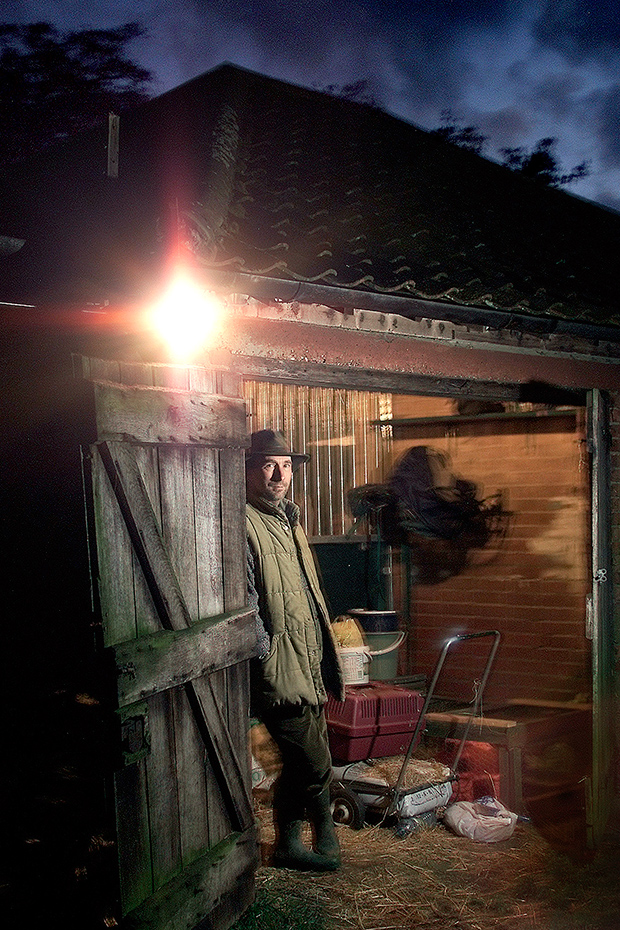
©Neil Turner/TSL, May 2008. 1/180th of a second at f4, 200 ISO
I was inspired to share the “how” for this picture because of a comment from a colleague who said that I had been “lucky to find such a nice pool of light”. I was amused, annoyed and complimented all at the the same time because I created this light and he obviously thought that it looked as if it was a natural effect. Much of the best lighting looks as if it were not lit… so how was this one achieved?
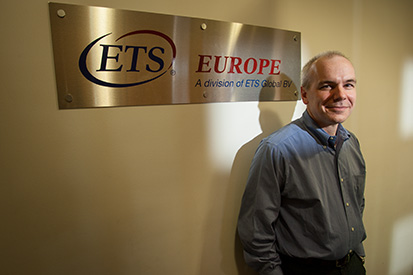
I had been asked by the picture editor to get a good range of portraits of this man who is the Vice President of a company that handles examination papers. The logo was needed in some frames and this plate screwed to a wall in a corridor was the only one on offer. The layout was like this..
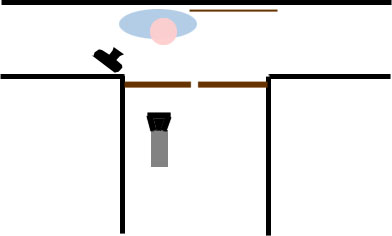
Single flash the other side of the door
The brown lines that you can see on the layout are fire doors – big heavy wooden doors with three small square glass panels in each one. The Lumedyne flash unit with a Pocket Wizard receiver on was placed outside the door and the door was closed. The subject was lit entirely by the hard, un-modified flash coming through those three glass panels. Lining up exactly where the light will fall is very easy – if the subject can see the flash head, then it can see them. After that it is just a question of shooting a couple of frames and judging on the camera’s LCD screen where the light is falling and then raising, lowering or moving the flash accordingly.
In this case the flash is about ten degrees above the subject’s eye line and he is looking almost directly at it. This allowed me to get the nice hard shadow behind his head and still have a reasnably flattering light on his face. I also tried to do a few rames where the ambient light in the corridor (see below ) was making the shadows softer but I much preffered the hard treatment.
©Neil Turner/TSL, May 2008. 1/10th of a second at f4, 200 ISO.
Technical Stuff: Canon EOS1D MkII with a Canon EF16-35 f2.8L lens.