work

The story behind a picture #3

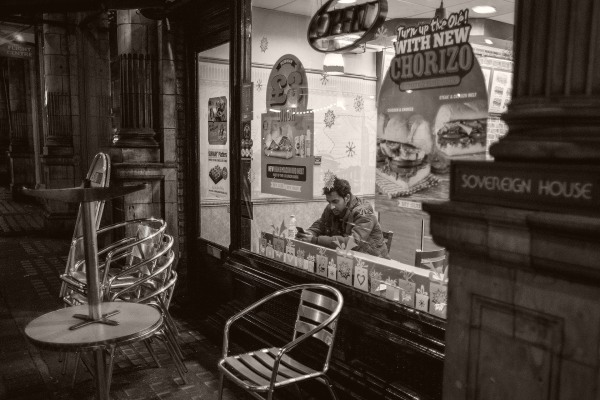
Sitting in the window seat at Subway on Shaftesbury Avenue Photo: Neil Turner Photo: Neil Turner

Sitting in the window seat at Subway on Shaftesbury Avenue
© Neil Turner, November 2014.

This photograph falls into the ‘personal work’ category. I had been to a meeting in central London during the evening and had arrived fashionably on-time having failed to park in my favourite evening parking space near the location of the meeting. That had forced me to park a bit further away. As a result my walk back to my car at around 10.30pm was both longer and much more interesting than usual.

I nearly always have a camera with me and it is nearly always either my Fujifilm X100S or it’s little brother the X20 but on this evening I had a Canon EOS6D with a couple of fast prime lenses and so I shot some photographs of things that interested me as I walked. This shop window – a branch of Subway that stays open until the early hours was the very first thing that caught my eye and I was very interested to see just how good the EOS6D is at higher ISOs. This was shot at 3200 ISO with a shutter speed of 1/250th of a second at f1.8 using a Canon EF 28mm f1.8 lens. For a DSLR this is about as unobtrusive as you can get – the quiet shutter mode is really good and the speed and accuracy of the auto focus on the centre focusing point means that you can ‘snatch’ a frame in really low light with quite a high degree of certainty.

Just around the corner I saw the potential for another nice image with the frontage of a theatre after the last member of the public had left the building. I composed, waited and finally got this frame as a solo pedestrian passed through the frame.
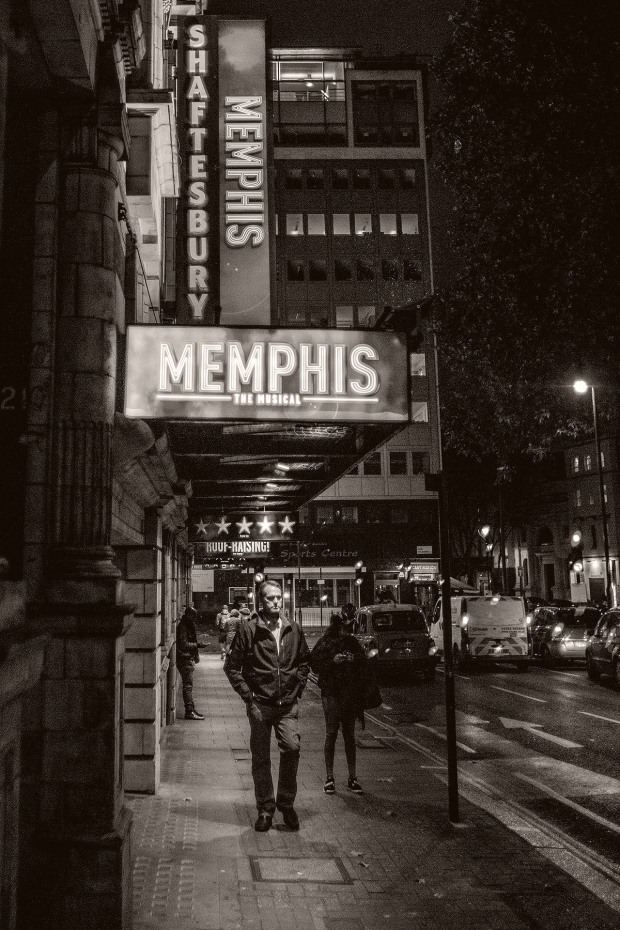
Pedestrian passes under the "Memphis" banner outside a west end theatre at night. © Neil Turner November 2014.

Pedestrian passes under the “Memphis” banner outside a west end theatre at night. © Neil Turner November 2014.

This photograph was also shot at 3200 ISO but was better lit at 1/640th of a second at f1.8. I was actually quite disappointed when I got back to my car and realised that I had a two and a half hour drive home. I knew that I had half a dozen good photographs and I sat in the car and transferred a couple of them to my phone using the camera’s built-in wifi before uploading them to EyeEm and Twitter. Then I drove home…
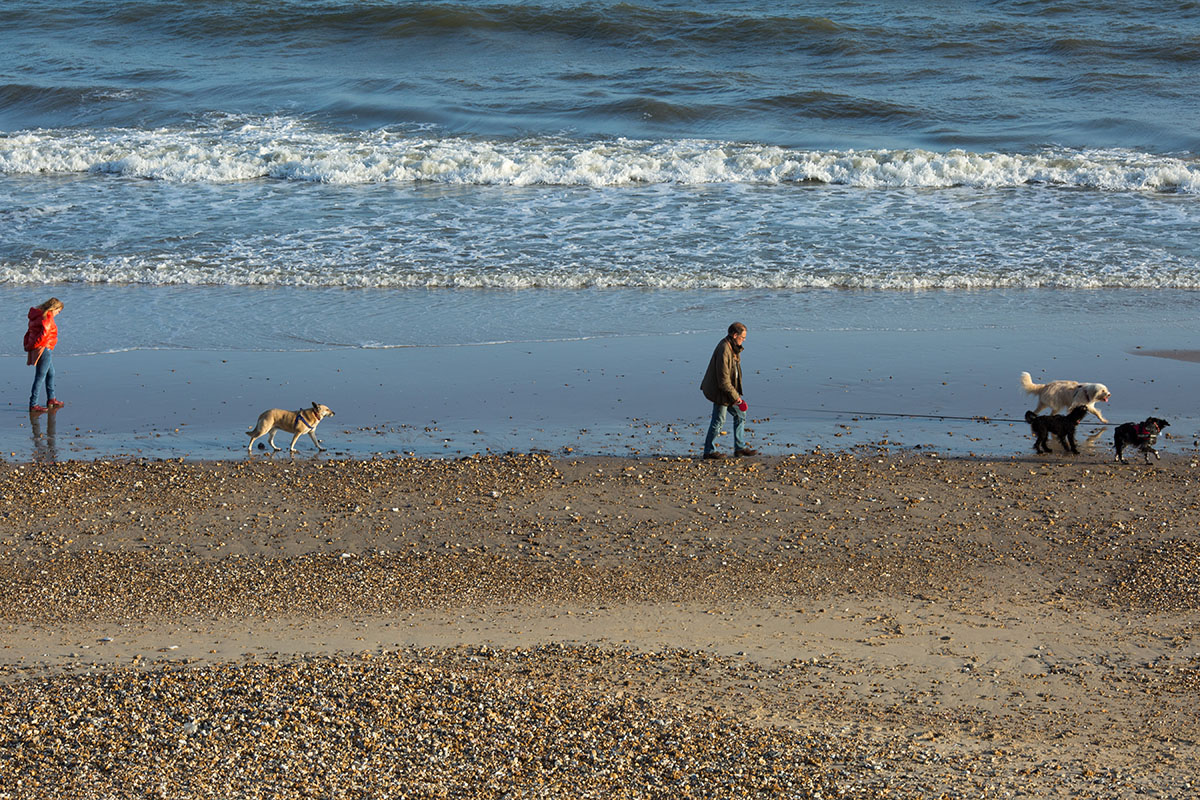
The hours before dusk

People exercising their dogs on the 'dog-friendly' beach at Fisherman's Walk as the sun begins to set.  © Neil Turner

People exercising their dogs on the ‘dog-friendly’ beach at Fisherman’s Walk as the sun begins to set.
© Neil Turner

You can’t publish a blog for more than a couple of years without repeating yourself somewhat and I have waxed lyrical about the light at dusk more than once before. It is especially useful when you are shooting subjects facing due south.

Through the middle of the day taking pictures looking out to sea at my favourite part of the beach near my home life is tough because you are shooting against the often strong sunshine. When there’s a cloudless sky by five or six o’clock in the afternoon and then through to sunset the angle and direction of the light as well as its colour and quality goes from nice to amazing. The type of activity changes too and the almost deserted beaches become the one place that draws me to go and take pictures because I want to.

I might also have mentioned my obsession with dogs on the beach and I am slowly but surely putting a body of those pictures together. I wanted a wide photograph that could stretch across a double page and have some headlines and copy run over it and I think that this picture from yesterday evening is a real contender.

The project will never be finished but there will come a day when volume one gets published in some form or other.

Techie stuff: Canon EOS5D MkIII with a Canon EF 135mm f2 L lens. 1/160th of a second f13 200 ISO

Quiet documentary image

©Neil Turner, January 2015. Flowers and a memorial plaque to four local surfers on Boscombe Pier.

©Neil Turner, January 2015. Flowers and a memorial plaque to four local surfers on Boscombe Pier.

The light on the beach is almost always interesting and whilst out walking this morning I shot a few frames of a small bunch of flowers tucked behind a memorial plaque to four young local surfers on Boscombe Pier. I guess that I would call this a documentary image and it is yet another different way for me to shoot a beach picture. For me the photograph is a great deal stronger for having the back of the gentleman in the frame.

Tech stuff: Fujifilm X100S, 1/170th of a second at f11 on 320 ISO. RAW file processed through Adobe Camera RAW in Photoshop CC2014.

Not the DSLR, I’m having fun

© Neil Turner, March 2014. Shadows on the pavement as a pedestrian passes along Tottenham Court Road.

© Neil Turner, March 2014. Shadows on the pavement as a pedestrian passes along Tottenham Court Road.

Question: Why are so many professional photographers using mirrorless cameras, micro 4/3rds format cameras and experimenting with pretty much anything that isn’t a DSLR?

It’s a tough question and without conducting some sort of major survey I can only give an answer based on my own experiences and those of close friends and colleagues. DSLRs have been my main cameras for over sixteen years now and they have become an extension of me when I’m working. They do what I need them to do with no real fuss, the quality has moved from “acceptable” back in 1998 to “extremely good” and they allow me to do the day job without having to worry about my gear very much. But, and there’s always a ‘but’ – they have become a little bit boring and little bit ‘too good’.

When I’m shooting pictures for the joy of it (and despite doing this for a living since 1986 I still do that) I want to feel something different. Elegant competence isn’t enough any more. (more…)

Hard light portrait

©Neil Turner/TSL, September 2007.

©Neil Turner/TSL, September 2007.

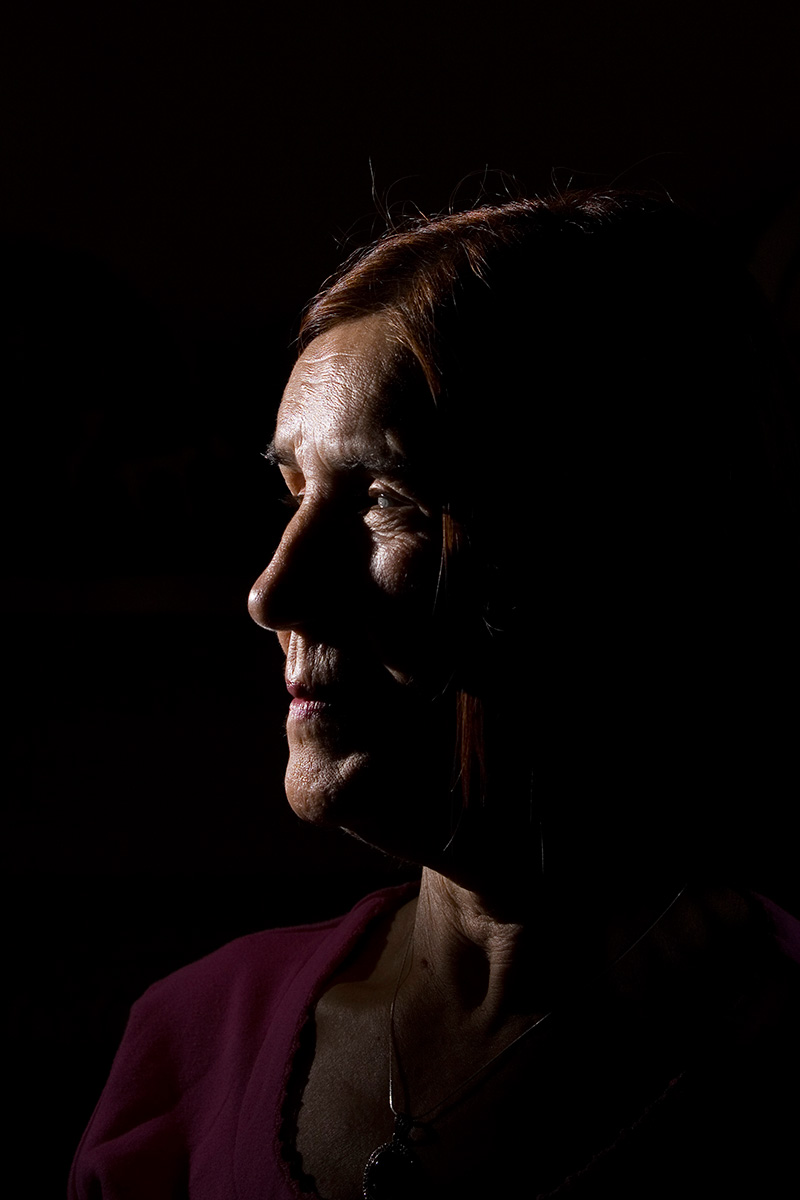
Not long after I took redundancy from my staff job at The Times Educational Supplement I spent several days putting together a collection of possible portfolio pictures. I was a long task as I’d been there for over fourteen years and when I eventually published my folio on line I had cut a couple of hundred photographs down to thirty. Whilst I was looking for something else today I came across that folder of 223 pictures and had a good root through.

Like most adventures down memory lane it reminded me of things that I’d forgotten and the story behind this picture immediately jumped into my mind. The lady in the portrait is a blind sculptor originally from Iran who was by this time married to a British teacher and living in south-west London. I have posted a portrait of her on this blog before when I discussed two surprisingly similar portraits that I’d made. This frame from the set has some of the harshest lighting that I’d ever used and it jumped out at me when I was looking today because I rarely use that kind of light any more. I guess that’s partly due to the nature of the clients I work for now – PR and corporates who don’t want anything as edgy as this was – and partly because my first instinct isn’t always to get the lights out any more. Even when I do light portraits I don’t mess around with the light as much as I once did. This goes with my Twitter #PWOTD which is TESTING

Techie stuff: Canon EOS1D MkII with a 70-200 f2.8 L IS lens at 70mm. 200 ISO 1/250th of a second at f8. Lumedyne flash.

Pools of light technique from 2008.

Every time I post one of my old technique examples I get a massive spike in the visitor figures for this blog. Despite some of them being fifteen or more years old they still seem to attract quite a bit of attention. This one is being re-posted after a specific request from a reader and I’ve added a second photograph at the bottom for a little ‘added value’.

©Neil Turner/TSL, May 2008

©Neil Turner/TSL, May 2008. 1/180th of a second at f4, 200 ISO

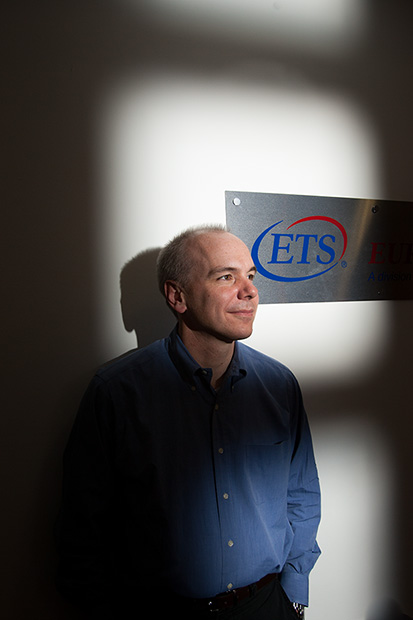
I was inspired to share the “how” for this picture because of a comment from a colleague who said that I had been “lucky to find such a nice pool of light”. I was amused, annoyed and complimented all at the the same time because I created this light and he obviously thought that it looked as if it was a natural effect. Much of the best lighting looks as if it were not lit… so how was this one achieved?

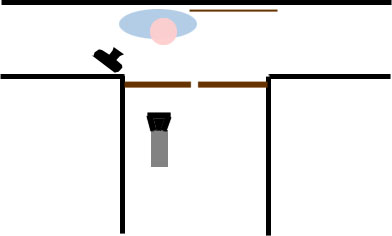
I had been asked by the picture editor to get a good range of portraits of this man who is the Vice President of a company that handles examination papers. The logo was needed in some frames and this plate screwed to a wall in a corridor was the only one on offer. The layout was like this..

Single flash the other side of the door

Single flash the other side of the door

The brown lines that you can see on the layout are fire doors – big heavy wooden doors with three small square glass panels in each one. The Lumedyne flash unit with a Pocket Wizard receiver on was placed outside the door and the door was closed. The subject was lit entirely by the hard, un-modified flash coming through those three glass panels. Lining up exactly where the light will fall is very easy – if the subject can see the flash head, then it can see them. After that it is just a question of shooting a couple of frames and judging on the camera’s LCD screen where the light is falling and then raising, lowering or moving the flash accordingly.

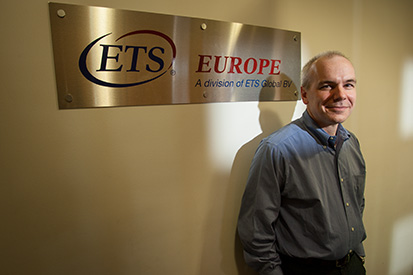
In this case the flash is about ten degrees above the subject’s eye line and he is looking almost directly at it. This allowed me to get the nice hard shadow behind his head and still have a reasnably flattering light on his face. I also tried to do a few rames where the ambient light in the corridor (see below ) was making the shadows softer but I much preffered the hard treatment.

©Neil Turner/TSL, May 2008

©Neil Turner/TSL, May 2008. 1/10th of a second at f4, 200 ISO.

Technical Stuff: Canon EOS1D MkII with a Canon EF16-35 f2.8L lens.

A fourteen year old technique post

Between May 1999 and June 2008 I posted a large number of technique examples on the original http://www.dg28.com taken from my daily work to show how I used light in an era where digital cameras were pretty poor at ISOs over 800 or even 400 in the case of the venerable Kodak DCS520. These days flash is a creative choice rather than a technical necessity but the techniques still stand up. From time to time I re-post one of these old examples just to remind myself how life used to be. This one was first posted fourteen years ago and for a very long time it was amongst my favourite pictures that I had posted.

©Neil Turner/ TSL, November 2000.

©Neil Turner/ TSL, November 2000.

At the time it felt as if I spent every evening answering follow-up questions about the pictures and techniques that I’d described. These days there are thousands, if not tens of thousands, of people publishing ‘how-to-do-it’ photography blogs but back then there were only a small number of us. It was such an exciting time in our profession. Anyway, here’s the post as it appeared back in November 2000:

Arriving at the job is usually the best times to start having ideas about locations for a portrait. Buildings often have features that lend themselves to use in a photograph, and the grounds can be just as inspirational.

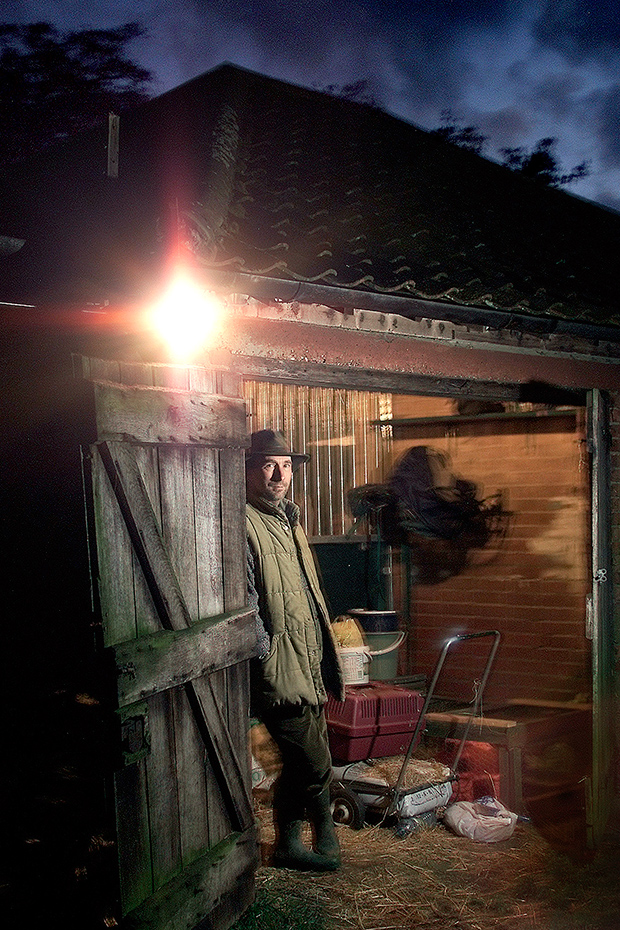
When I arrived at the Suffolk farmhouse of journalist and author Simon Barnes, he and his wife were busy chasing one of their horses around the yard. By the time the mare was back in one of the stables it was all but dark, but I had seen just how wonderful the other stable looked lit by the 60 watt bulb inside it. 

This image called for the mixing of available light and fifty joules of Lumedyne flash. The flash head had it’s diffuser cap over the standard reflector at an angle of 60° from the lens axis and at a height of about six inches above Simon’s eye level. I had to use the flash a lot lower than I would have done because I wanted him to keep his hat on and the if the flash had been higher his face would have been in shadow from it’s wide rim.

Cut down to it’s minumum 50 joules at a distance of seven feet the flash reading on 200 ISO was still f6.7, which was a lot more than I would have liked. At f6.7 the inside of the stable needed an exposure of about 1/3rd of a second, and the sky needed 1/2 of a second to get some detail in the lighter areas. The discrepency between the two exposure requirements was only half a stop, so I went with the longer exposure because a little over exposure inside the stable would be fine. 

With a 28-70 f2.8L series lens on a DCS520 I started shooting pictures of the upper half of his body and a little of the stable roof and sky. Without changing the exposure I changed lenses to the 17-35 f2.8 and moved back. As I moved back the sensor floodlight came on and the light shining into the lens gave some strange pink flare (bottom right) and the floodlight made an excellent element in the composition. By this time I was hand holding the camera at 1/2 second, which meant that there would be some camera shake so I shot about twenty frames at the same exposure in the hope that a few of them would be still enough to work. 

I shot some safer images as well with the inside of the stable lit by another Lumedyne head complete with a warm up filter to simulate the tungsten glow. The image worked really well, and I am more than happy with it. It shows that light and location are the most important factors when planning a location portrait.

Footnote: Immediately after this job I started to carry a sheet of -2 stop neutral density gel in my bag. I have learned lots of lessons the hard way since the beginning of my career in 1986 and, whilst they are fewer and farther between, I still learn plenty of things that way.

Late November afternoon in the park

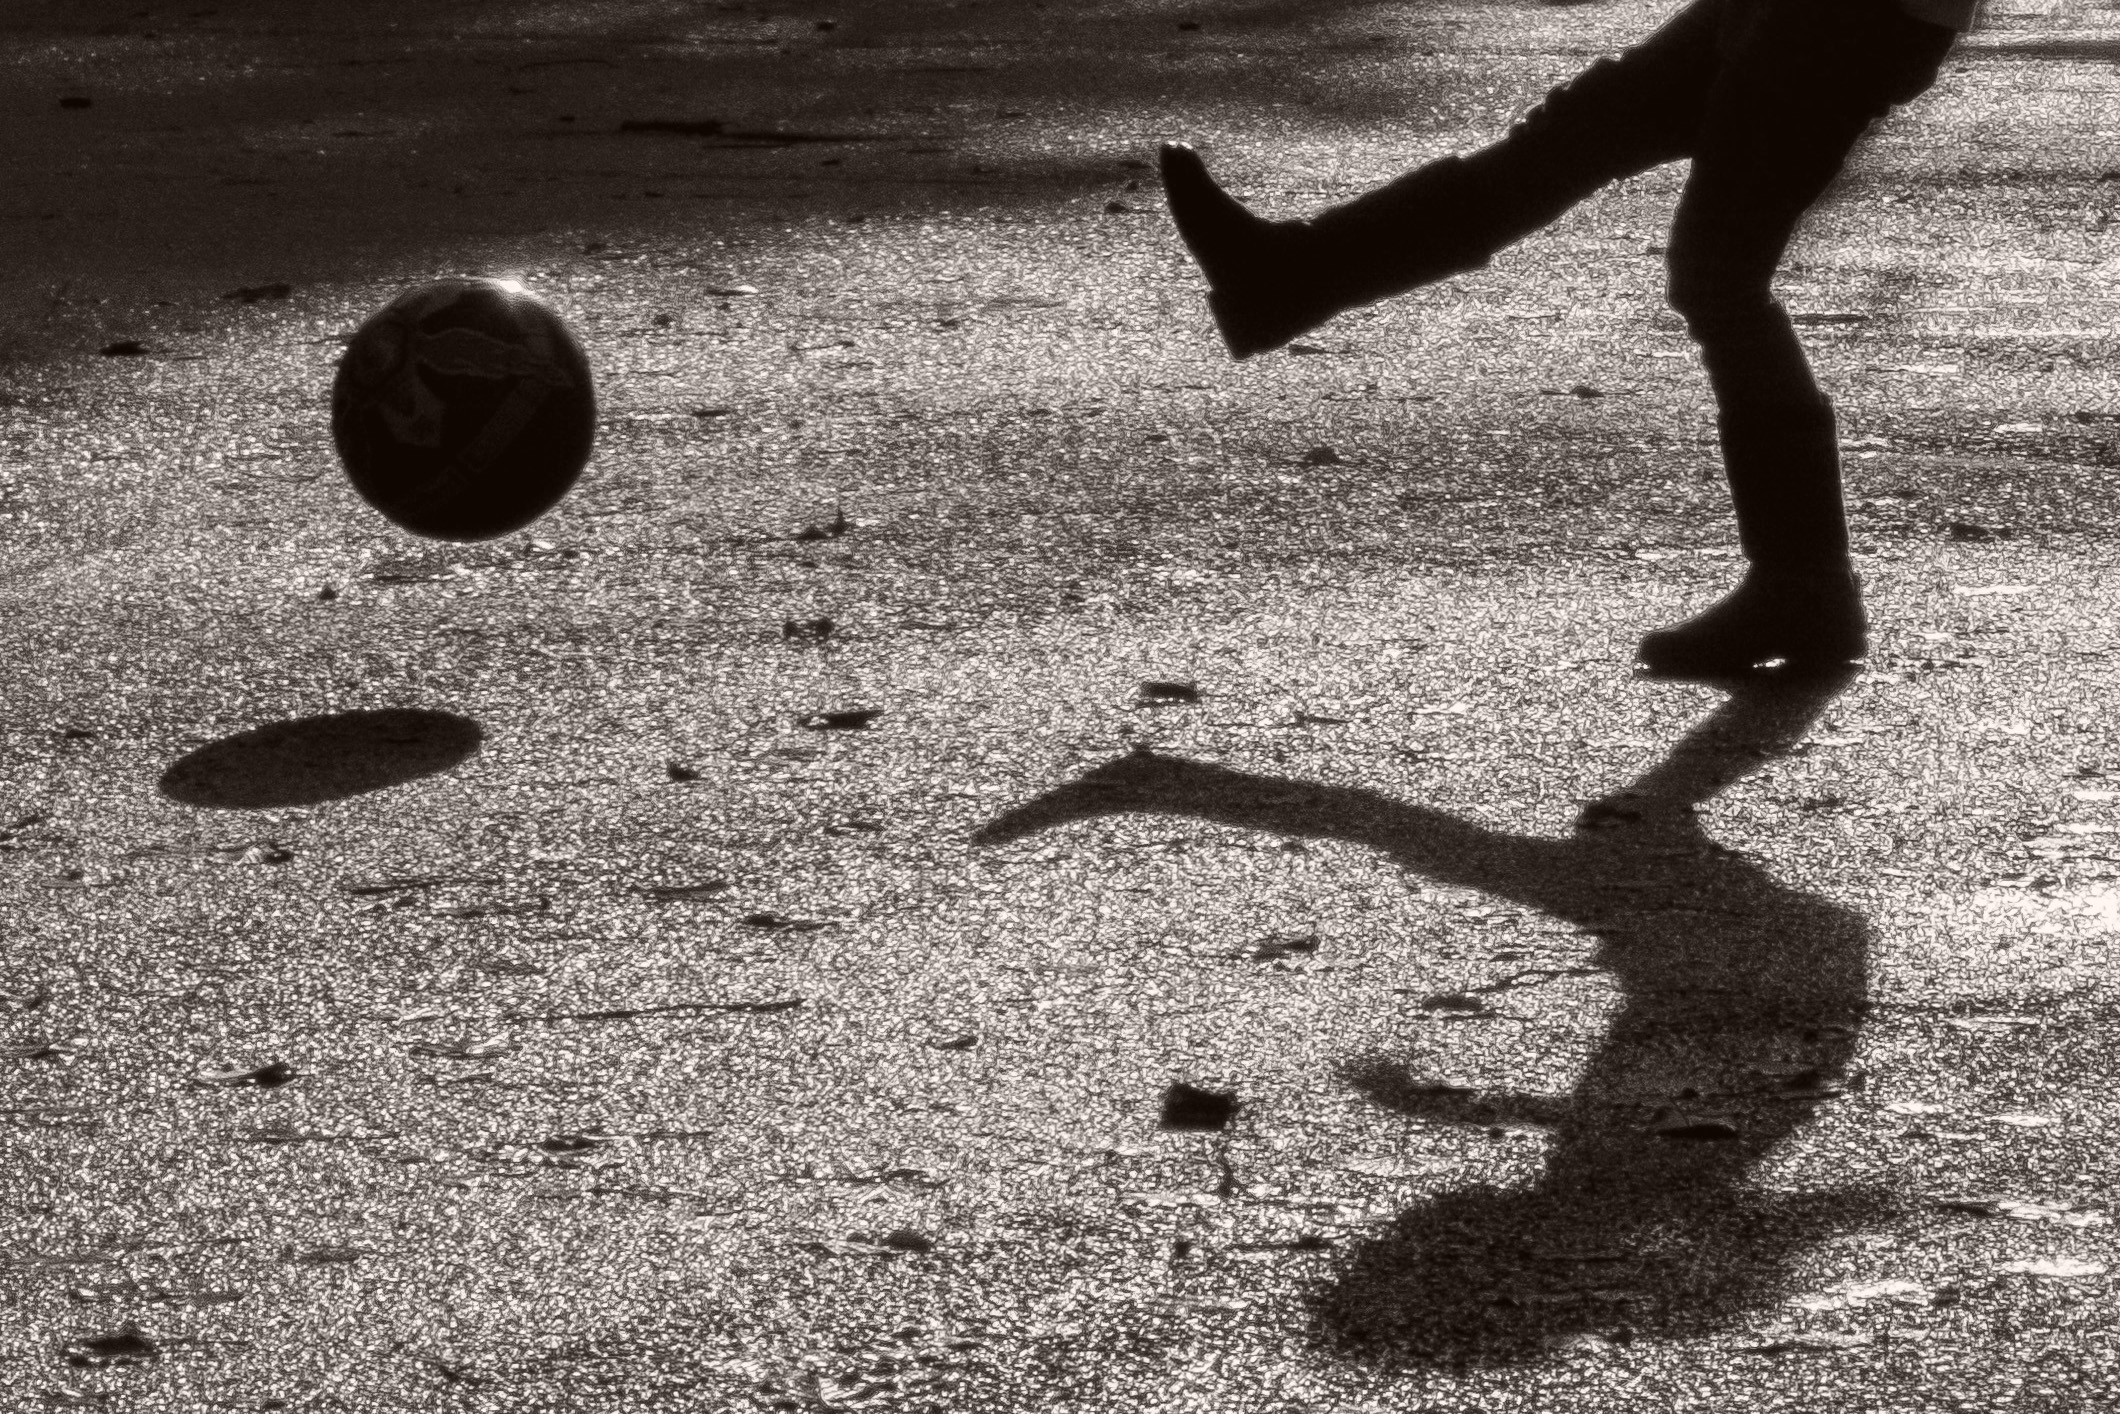
©Neil Turner, November 2014. Playing football in the  park.

©Neil Turner, November 2014. Playing football in the park.

This is just another of those “just because I like it” photographs that I have added to my personal work folio on my Pixelrights account. The family had been out to breakfast and we went to the park for the youngest members to have a run around. I had my Fujifilm X20 with me and shot a few frames including this one.

For the technically curious amongst you, the black and white conversion was done in Photoshop with a 5% red layer added to the desaturated sRGB file to give it more body and depth.