work

Five day black & white challenge

©Neil Turner, November 2014. A young woman jogs along the promenade near Portman Ravine in Bournemouth with a child in a pushchair.

©Neil Turner, November 2014. A young woman jogs along the promenade near Portman Ravine in Bournemouth with a child in a pushchair.

A couple of weeks ago I was nominated by another photographer to take part in a Facebook Five Day Black & White Challenge. The idea was simple: to post a new black and white photo every day for five days. I have to admit that I was a bit reticent at first and posted pictures that I’d already taken in the previous few weeks. Then someone mentioned that they found the discipline of having to go out every day and shoot something new invigorating and so I started the challenge over again and shot specifically for it every day. My second challenge ended yesterday but it wasn’t until I was out shooting again today that I remembered that the challenge was over. What to do with the pictures from day six? The answer was to post the chosen frame to Facebook anyway and then to post it here too – as another “just because I like it” frame.

Technical stuff: Canon EOS6D with a 28mm f1.8 EF lens (cropped slightly). 160 ISO and 1/1250th of a second at f11 RAW file converted and desaturated using Adobe Camera RAW CC 2014 with a 5% bronze tint added.

After the storm

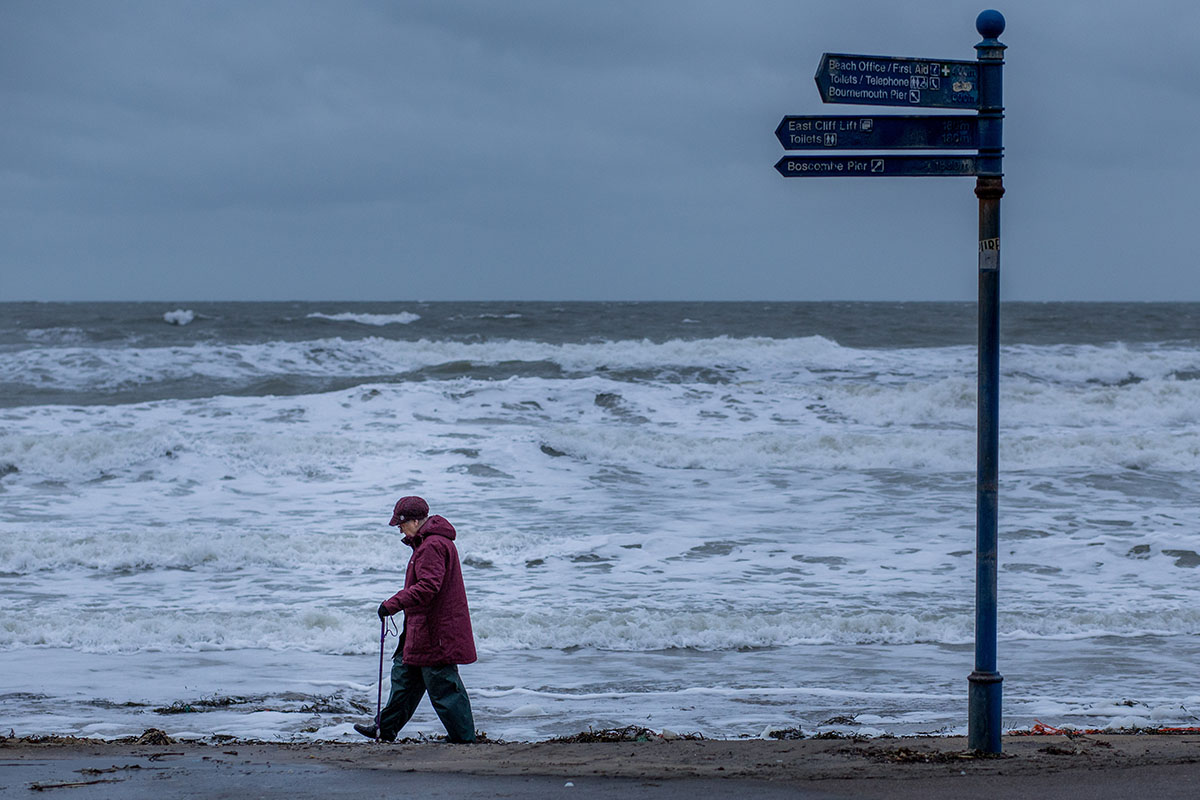
©Neil Turner, November 2014. A pensioner walks along the beach near Bournemouth Pier.

©Neil Turner, November 2014. A pensioner walks along the beach near Bournemouth Pier.

Following on from my post about zoom and prime lenses I was out with just the primes yesterday – walking along one of my favourite bits of beach in wild winds and failing light. I was just out having some photographic time before getting into the car for yet another drive up the M3 for work. This one was shot at 640 ISO at 1/1000th of a second at f4 with an 85mm f1.8 Canon EF lens on my rather lovely little Canon EOS6D – a camera that I am becoming increasingly fond of. When I’m doing personal work like this I tend to set the white balance to daylight and accept whatever colour cast I get and in this case it wasn’t far off of what the naked eye saw.

Empathy

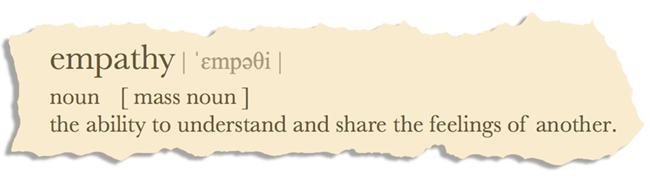
empathy

As photographers we have a vision. We know how we want our photographs to look and we know what kind of response we are trying to encourage from our viewers and from our clients. When we don’t get the reaction that we were looking for or we don’t get any reaction at all then we have either got it wrong or we have a vision so unique that nobody else gets it.

One of the qualities shared by pretty much all of my favourite photographers is the ability to empathise. The best of the best can do it on just about every level too. They understand the feelings and motivations of those that they are photographing every bit as well as they understand those of the target audience. It doesn’t matter if that’s the doting parents of a newborn baby in a studio in the northern hemisphere or the parents of a critically ill child in the southern hemisphere – having the ability to imagine yourself into the position of those whose lives will be effected by your photography is a key skill. I find it hard to think of a genre of photography where empathy wouldn’t be right up there with an understanding of composition or light as a piece of the jigsaw that comes together to make us ‘photographers’.

Somebody reading this is gesticulating at their screen and shouting about being single-minded and determined and not letting emotion get in the way of doing a good job and they have a valid point. Having empathy doesn’t always mean that you have to act on it. There will always be situations where you have to put your ability to understand everyone else’s needs and desires to one side and shoot the pictures that you need to shoot in the way that you need to shoot them but the great photographers – even the single-minded great photographers – have empathy.

If your are finding it hard to agree with this idea then I’d ask you to look at some pictures and try to work out whose feelings, needs and desires the photographer concerned might have been taking into account and/or ignoring when they shot them. I would hazard a guess that the pictures that have the most impact will be those where empathy is a factor and those that are just eye-candy are those where empathy isn’t a big part of the formula.

If you haven’t seen Pixelrights – check it out…

pixelrigts_ss
When friends of yours start up a new business it is natural to wish it well and then forget all about it until you see those friends again. That’s kind of what happened with me and Pixelrights. Shaun Curry, one of the founders is an old mate and when he rang me out of the blue a while ago to explain his new business venture I was happy for him and offered my support as I would with pretty much any of my friends.

A few months later Shaun got back to me and asked to ‘borrow’ a couple of pictures for their development website. Always happy to help I sent him a couple of JPEGs and signed up for email, Facebook and Twitter feeds to remain abreast of their progress. Once more, nothing much happened and then Pixelrights offered to develop the new website for The BPPA and suddenly there I was having an in depth explanation of their ideas complete with a demonstration of what their idea could offer.

Passive supporter becomes active advocate over the course of one afternoon. I love the idea and I really love the fact that these are people doing what they are doing for money AND for the love of what they might achieve. So what is Pixelrights? Here’s a cut and paste from their own concept page:

Working in photography and the visual arts ourselves, we wanted to create something that we would not only use, but also enjoy using. We saw the need for simple, functional yet sophisticated portfolios which would serve photographer’s interests and needs, in an honest manner with no marketing trickery.

Pixelrights provides a secure, simple, classically-presented choice of website designs, backed up with state-of-the-art technology, all for a single price. There are no hidden charges to remove branding, no divisive price plans and no subscription fee traps.

What it actually provides is a portfolio of the simplest form with good image protection and the option to allow carefully controlled and monitored sharing. There are quite a few design options and there will probably be more by the time the current “Beta” phase is completed. I have three folios on my pages and I have a range of hidden galleries which are invite only so that clients can go and look at images that I have uploaded for them to Dropbox making use of a cool and simple interface. The whole point of a beta phase is to gather opinions of users and make things even better and that’s exactly what is happening.

I’d strongly recommend that you go and check out Pixelrights for yourself and the best way to get there is via my members page. Make sure that you look at the features and the pricing because this is a good idea from good people with an awful lot of backing from working photographers.

Tonality – the black & white conversion app

Screen grab from Tonality 1.1.1

Screen grab from Tonality 1.1.1

I was intrigued by a recommendation that I read from a colleague for Tonality. I rarely go outside Adobe Camera RAW these days, even for black and white conversions, but I was tempted to have a go at something new and so I went to the Apple App Store and bought it. After a few attempts at fiddling with it I dismissed it as a very interesting application that I would master one day when I had the time. A few days ago I was asked by a client to convert a lot of images supplied to them as colour Jpegs into mono Jpegs with a slight tone over them. In the past I would have gone straight back to the RAW files and started again but I had the idea of giving Tonality a go.

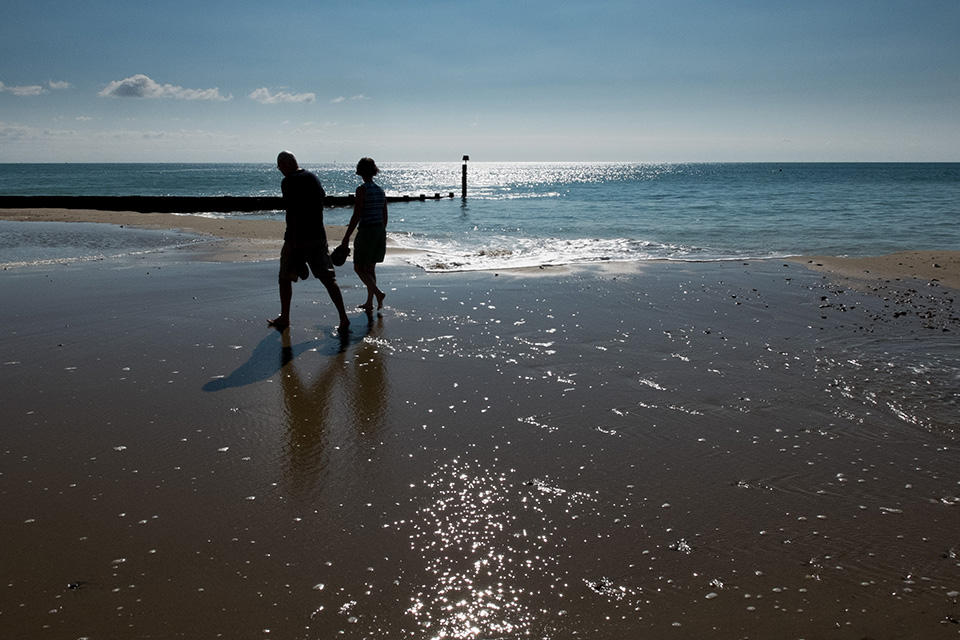
Like so many of the corporate jobs I shoot, the client would rather I didn’t show they images on my personal blog and so I grabbed some other interesting pictures from my ongoing personal work and applied the same sort of presets to them. It had taken me less than five minutes to become familiar with the sliders and controls and probably another five minutes to create the ideal and very subtle split toning effect that the client had been asking for. The two versions of a photograph taken on the beach at Bournemouth that you see below were a quick test for this blog post. The colour image is a Jpeg converted from a Fujifilm X20 RAW file in Adobe Camera RAW and the black and white version underneath was converted into black and white using the “adaptive exposure” auto setting in Tonality from that Jpeg.

©Neil Turner, September 2014. Bournemouth.

©Neil Turner, September 2014. Bournemouth.

©Neil Turner, September 2014. Bournemouth.

©Neil Turner, September 2014. Bournemouth.


I don’t know what you think but I am really impressed by the job that the auto has done and, whilst I could fiddle and get it even better, I am more than happy with it. I can hear you saying that this is also easy to do in Photoshop (and quite a few other apps and plug-ins) but the point is that it was done in Tonality and it was really easy. The application is capable of a lot of good stuff as well as a lot more completely over the top special effects that I wouldn’t touch with a barge pole.

When I get more time, I’m going to get right under the skin of this application. Until then, it will be used on my personal project work. If a client asks for toned mono images again, I will definitely look as using Tonality for that too.

The UK price is £13.99 – which is a little bit dearer than most Apps that I would buy just to have a play. It’s a very simple app that achieves its goals.

Working other people’s files

From time to time I work with teams of photographers as an editor. It’s part of the ‘rich portfolio’ of roles that I have these days. 80% or more of my work is still shooting pictures and that’s great but for the other 20% of my working life I enjoy doing some other photo-related stuff. I’ve written before about teaching and running workshops and one of the workshops that I do is about sharpening up your workflow. For me the best way to help others improve their workflow is to sit down with them and go through how they work and then refine what they already do rather than to throw everything out and start again.

Editing other people’s work is a whole other matter. Imagine being in a deadline driven environment where you have several photographers all shooting RAW and where you have to occasionally grab their memory cards and do some of their edits for them. On one recent job I handled CR2 files from Canon EOS1DX, EOS5D MkIII and EOS5D MkII cameras as well as NEF files from Nikon D4S, D4, D3S, D3, D800 and D610 cameras over a two week period. Some of the cameras were left on factory settings and others had been set up by their owners to the point where none of the settings were left unchanged. RAW files obviously allow you to return the completely unchanged state but I am a believer in the idea that you trust the photographer to have made changes on purpose and to respect those changes wherever possible as you come to edit their files.

The old, old Nikon Vs Canon debate morphs into a NEF Vs CR2 debate. As a long-time Canon user myself I thought that I’d find the CR2 files far easier to work with and I was ready to spend far more time getting NEFs right. The biggest shock was that it was entirely the other way around. Files from the latest Nikon cameras can be easy to work with. Really easy. I realised after only a few hours that, as long as the in-camera settings weren’t eccentric, NEFs from the D4, D4S and the D800 were not only easy to work with (requiring relatively few adjustments) but that the quality was uniformly high. In contrast the imported CR2 files from all of the Canons looked a lot less impressive as they landed in Photo Mechanic and then in Adobe Camera RAW. On average, it took more clicks of the mouse (maybe 50% more) to get the CR2s looking as good as they should.

Needless to say, this was quite a revelation. It isn’t as if I hadn’t worked with other people’s files before but this was the first time that I had seen the results of so many different people’s work from so many different cameras in such a compressed space in time. The pictures were all coming from top class photographers and the end results were largely indistinguishable from one another but the route to get there was certainly different. There are way too many variables to draw any definitive conclusions from this but I can say the following;

  • Any reservations that I might have once had about the NEF file format are long gone
  • The results achievable from both NEF and CR2 full-frame cameras are on a par with one another
  • The idea that the colours rendered by Nikons and Canons are inherently different has a small toehold in fact
  • The RAW files from all of these cameras are incredibly versatile and you can get the desired results from either
  • Given the choice I’d go with the NEF from a well set up D4S as the file from other people I’d prefer to work with

Since that event where I worked all of these files side-by-side I have also had a long play with NEFs from a D810 and a D800E. They both require careful handling because of the absence of a low-pass filter over the chip. This gives greater apparent sharpness and a degree of “pop” that is hard to describe but on the flip side it is much easier to mis-handle the files and introduce noise and chromatic problems when using a RAW converter or Photoshop itself. To get around this you find yourself constantly switching between degrees of magnification on the screen to check the effects of any changes to contract, highlight, shadow, saturation or sharpening that you apply. I found this to have a significant slowing effect on my workflow but I also loved the quality of the images produced. The D810 is a camera that I’d happily add to my list of those producing desirable files to work with.

So, NEF Vs CR2? Out of the blocks the NEF files that I’ve worked with over the last few months streak into an early lead but the CR2s catch up along the back straight and they are neck and neck at the line. For now…

Stage two of the RAW argument

Ten years ago the “should I shoot RAW” debate was raging between all kinds of photographers. Slowly but surely the vast majority of us have moved over to the RAW camp having realised that you not only get better quality but can also save time if your workflow is good enough. OK, so you only get 300 images on an 8 gigabyte memory card but memory is cheap these days and all of the other advantages of shooting Jpegs (unless you are offloading files straight from the camera) have disappeared one by one.

So that’s stage one of the RAW argument out of the way.

Screen Shot 2014-07-17 at 10.39.41

So far, stage two has appeared to be a whole series of “my RAW converter is better than your RAW converter” arguments played out endlessly across social media. Proponents of one system produce videos that “prove” their point of view on YouTube and then those links are posted on Facebook, Twitter and who knows where else until someone else comes along and “proves” the exact opposite. Some of them even try to sell you expensive and largely pointless plug-ins and actions that promise to take your photos and turn them into masterpieces in a single click of a mouse. Is it all valid comment or is it just hot air? I’m leaning heavily towards the latter.

Buying, learning and mastering every single quality converter would be expensive and mind-numbingly dull. Few of us use any software to anywhere near its limitations and some of the claims for various applications go largely un-challenged.

A few years ago people started to talk excitedly about Capture One as being a gold-standard amongst RAW converters. It would have been around version four that I persuaded my then employer to send me on a one-day course to learn the basics of the workflow. It was good. It was actually very good and I bought it (well, my employer bought it for me). Fast forward to version six and I wrote glowingly about it on this blog saying that I really liked it despite a few flaws. Well of course that was comparing it to Adobe Camera RAW in Photoshop as it was then. Both applications have upgraded since then as have Aperture, Canon DPP, Nikon Capture, DxO and a range of others. Each of them has advantages and disadvantages that skilled users of each piece of software can and will point out to anyone who will listen. Those skilled users can also get the very best out of a file using their chosen converter. Capture One Pro 7 is wonderful but so is Adobe Camera RAW 8.5 and so are lots of others.

And here is the first major conclusion – as long as you have the RAW file, you can endlessly go back and rework those files with every new and supposedly better application you try or buy. For the record, I don’t believe that there is anything other than a tiny difference between the best of them when it comes to image quality if the person doing the work has the skills and experience to get the most out of the files or the software. The old “this application is better at recovering highlights” comment that you hear so often is not only subjective but largely a thing of the past. As new versions come out and as new cameras present us with new variants of the RAW formats then differences do become apparent. A quick upgrade to your chosen application and those problems go away again.

Here is the second major conclusion and the principle piece of wisdom that I want to impart: It’s all about the interface. How you interact with the application has a greater influence on what you get out at the end than anything else. Application A does a great job but so do Applications B and C. If you are comfortable with B then choose B and don’t stress about the relative merits of A or C until such times as B can no longer deliver the quality from your files that you and your market demand. Changing workflow and moving to a new RAW converter is painful, time-consuming and throughly depressing (unless you are a geek like me). My heart goes out to the Aperture users who are facing having to do just that at some time in the near future now that Apple have announced that they are stopping development.

As software gets better, the files we process through that software gets better and our workflows become more embedded someone, somewhere will do some “testing” and pronounce that they have the perfect workflow and Groundhog Day will be upon us for the zillionth time.

I sometimes end up working with other photographers files and the difference between types of files is astounding. Canon 5D MkII files next to Canon 5D MkIII files require different handling but the difference between those and something like a Nikon D4S file is astonishing. Not better, not worse but different. Different to the point that you have to tweak your technique. Using the exact same software, workflow computer and set-up the two types of file react very differently to the same treatment. This, ladies and gentlemen, is my third and final major conclusion from stage two of the RAW debate – Not all RAW files are created equally so don’t assume that you can work the same way with them.

Bring on stage three please.

Electrical safety for UK photographers

Most of us use some sort of mains powered gear and most of us fly with our equipment from time to time. The law regarding what you have to do to comply with the rules around safety of the gear can make pretty good bedtime reading – if you need to go to sleep quickly. Portable Appliance Testing or PAT for short is the stuff of myth and legend and here are a few key points that photographers should be aware of gleaned from the UK Health & Safety Executive’s many handouts on the subject.

Portable Appliance Testing (PAT)

Portable appliance testing (PAT) is the term used to describe the examination of electrical appliances and equipment to ensure they are safe to use. Most electrical safety defects can be found by visual examination but some types of defect can only be found by testing. However, it is essential to understand that visual examination is an essential part of the process because some types of electrical safety defect can’t be detected by testing alone.cutouts

A relatively brief user check (based upon simple training and perhaps assisted by the use of a brief checklist) can be a very useful part of any electrical maintenance regime. However, more formal visual inspection and testing by a competent person may also be required at appropriate intervals, depending upon the type of equipment and the environment in which it is used.

Electricity at Work Regulations 1989

These require that any electrical equipment that has the potential to cause injury is maintained in a safe condition. However, the Regulations do not specify what needs to be done, by whom or how frequently (ie they don’t make inspection or testing of electrical appliances a legal requirement, nor do they make it a legal requirement to undertake this annually).

The frequency of inspection and testing depends upon the type of equipment and the environment it is used in. For example, a power tool used on a construction site should be examined more frequently than a lamp in a hotel bedroom.

So what does this actually mean for photographic equipment? Cameras are not covered by PAT but the batteries and chargers are. Batteries used in 99% of cases are contained and sealed and therefore should only require a visual inspection. Damaged terminals or cracked casings can mean that equipment is not safe and the item should either be disposed of or inspected by an approved repair centre.

Please remember that all batteries now have to be disposed of under the Waste Electrical and Electronic Equipment (WEEE) and Restriction of Hazardous Substances in electrical and electronic equipment (RoHS) directives aim to reduce he quantity of waste from electrical and electronic and increase its re-use, recovery and recycling. The RoHS directive aims to limit the environmental impact of electrical and electronic equipment when it reached the end of its life. It does this by minimising the hazardous substances of legislation controlling hazardous substances in electrical equipment across the community.

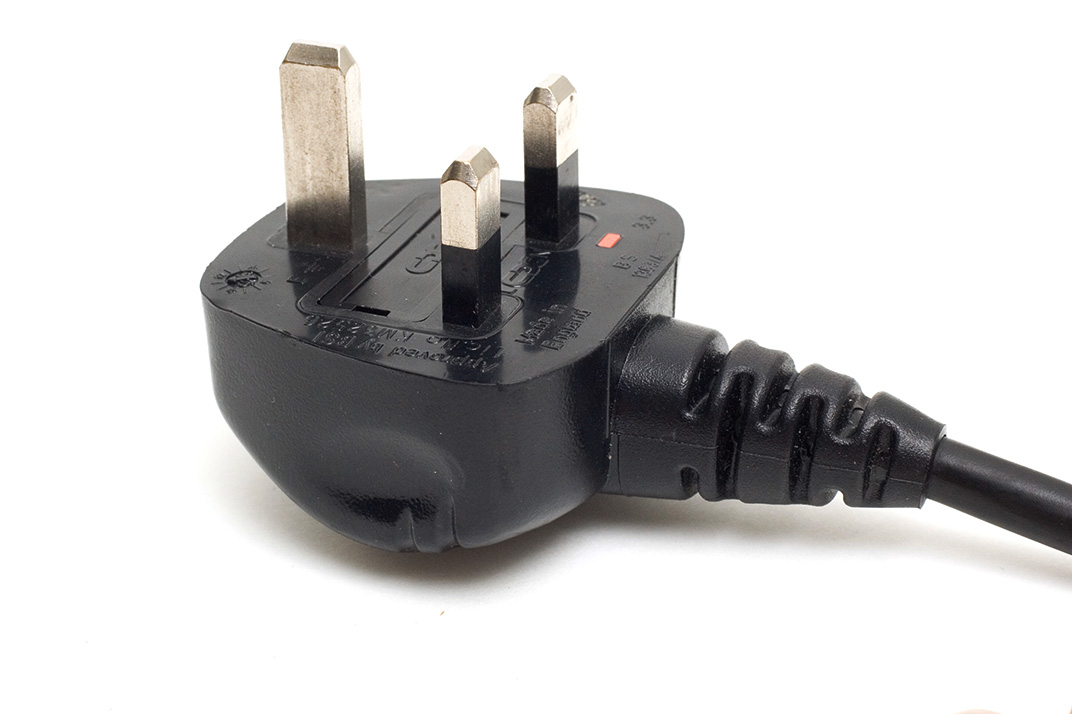
PAT covers all cables and all electronic equipment rated at over 40Watts – which means pretty much everything that we use. The cables, leads and plugs connected to class 1 equipment (everything we use apart from lighting) should be checked visually for damage, breaks and past repairs on a regular basis and should be checked properly on a cycle of between 6 months and 4 years depending on exactly what it is. In practice that means every six months for cables and every year for power adapters, extension leads and battery chargers. Heavy duty batteries and mains powered lights should be professionally tested at least every two years and more regularly if they are subject to heavy use.

Travelling with batteries

The International Air Transport Association (IATA) in association with the International Civil Aviation Organisation (ICAO) and the United Nations (UN) set clearly defined rules regarding the air transportation of Li-Ion batteries.

From January 1st 2012, the 53rd Edition of the IATA Dangerous Goods Regulations requires the independent testing of each type of Li-Ion battery, not just the individual cells, to ensure that the design and construction are compliant with the stringent United Nations regulations. This is a costly process for the manufacturer, but it should assure you, the customer, that the battery design is safe and of the highest possible professional standard. You should check with the manufacturer  of each type of cell whether they comply with the regulations before you travel by air or on certain rail journeys which feature long tunnels.

  • Check-in of Li-Ion batteries is not allowed unless the battery is attached to the camera or the equipment it powers
  • An individual may take on-board, in hand luggage, an unlimited number of Li-Ion batteries that have capacities of 100Wh or less.
  • Li-Ion batteries that have capacities greater than 100Wh, but less than 160Wh, are restricted to 2 items per person, in hand luggage.
  • Li-Ion batteries that have capacities greater than 160Wh cannot be taken as hand luggage or checked-in under any circumstances.