commercial

Elinchrom Ranger Quadra – 32 months on…

Most of the camera equipment reviews that you read are written after using the kit for a few days – or even a few minutes in extreme cases. I know. I’ve done several two or three day reviews myself. I was looking at my kit the other day and thought that it would be very useful to write a few lines about my Elinchrom Ranger Quadra system which I have been using for very nearly three years and which has been used on hundreds of assignments.

Build Quality:

When I wrote my first “mini-review” about the system in June 2009 I had only been using it for a couple of weeks but, after years of using the similarly specified Lumedyne Signature and Classic outfits, I can safely say that the Elinchrom fitted straight into my way of working very quickly. Back then I decided to talk about build quality first:

MAY 2009: The first point is to re-emphasise just how small and light this kit is compared to most other portable flash equipment – even Canon and Nikon Speedlights with external battery packs aren’t that much bigger or heavier.

The second point is that being small and light doesn’t appear to make this gear any less robust or well made than anything else. As a long time user of Lumedyne kit I can vouch that the combined weight of a Lumedyne Signature pack and head is almost identical to the Elinchrom Ranger Quadra. The Elinchrom pack, however, seems infinitely more robust with it’s rubberised edges and properly weather resistant control panel whilst the head is both simple and tiny. Connecting the two is a sensible and nicely made piece of cable with easy to use fittings. I have just been and tried the “heavy winter gloves test” and can report that it is very easy to attach and detach the cable with them on.

At this point I had better introduce a small criticism, lest anyone think that I’m doing a PR puff for the manufacturers. I like to attach my packs to the stand to give a bit more stability in the wind and the Lumedyne packs had very functional ‘D’ rings at either end that allowed you to attach a strap and anchor the pack to the stand. The Elinchrom Ranger Quadra pack has well made but small eyelets through which you have to slot either a large split ring or the small karabiner type ring that was supplied with my kit. Neither is a good solution and I will be on the lookout for a better way of attaching a small strap.

Whilst I’m doing the criticism thing, I have an admission to make: I wasn’t all that keen on the battery catches when I first got the kit. I found them to be stiff and not easy to use. Something has happened and I’m now completely fine with them. Maybe they have loosened off a touch or I have just worked out my technique. Probably a bit of both, but the end result is that the batteries come on and off nicely now and I withdraw my earlier criticism.

Now in 2012, to be completely honest, my opinion has barely changed. The battery clips have eased a little more and the ‘D’ rings still bug me. The screw caps that cover the two power lead sockets have survived all this time and still work very well and are still attached. I know that Elinchrom have made a few design changes since I got my kit but these three things have not changed at all.

The size and weight of the heads was flagged up as a potential issue by a couple of early reviewers but I can honestly say that 32 months on I have not had any problems other than a bad drop of a head which buckled the small ‘spill-kill’ reflector to the extent that I had to replace the reflector. No damage to the head, the flash tube or the modelling light. I had early reservations about the strength of the stand adapter on the heads and for a while I chose to remove the swivel completely and replace it with a brass stud which then fitted into a Manfrotto Light-Tite. In the end, my worries abated and I went back to the original tilt mechanism.

Not long after buying the kit I experimented with ways of attaching a soft box without buying the Elinchrom adapter. You can see my best attempt in the picture to the left. It was a complete fluke that the spill-kill reflector wedged directly into a blank Photoflex Speed Ring and I still use this IF I need two soft boxes on a single shoot. In the end I gave in and bought it and I now feel rather silly that I didn’t do it straight away. The adapter is a decent option and it works very well with my Elinchrom and Chimera soft boxes.

Thirty-two months down the line and the kit still looks great and works like new. I have looked after it, kept it in decent bags and cases and always put it away properly. The few times that I have used it in the rain, I have used plastic covers made from heavy duty PVC and freezer bags to keep the rain off. There are a few bits of paint missing on the pack and the batteries. The one exception, and the main reason that I chose to write this now, is that the two batteries are starting to lose power. I have no idea how many charge cycles they have been through but it is a large enough number for me to start to think about replacing them. Three years is a good life for this kind of batteries and I’m not going to hold any loss of capacity after that time against Elinchrom. The cables are tough and well made and all of mine are still OK.

In Use:

After a few months I fed some thoughts back to Elinchrom via the folks at The Flash Centre in London and those were:

  1. that the digital display was hard to see in bright light
  2. that lining up the power leads with the sockets was difficult in low light
  3. that the Skyport triggers needed a locking ring so that they didn’t keep popping out of the camera’s hot shoe.

I wasn’t the only person making these suggestions and in an upgrade they fixed the display issue and the Skyport trigger issue as well. But what else did I think back 32 months ago?

MAY 2009: That’s the construction out of the way. What about actually using them? I have read through the manuals for the head, pack and Skyport remote trigger system and it is all pretty logical. If you buy this kit, I would strongly recommend that you go through a few practice sessions before going live because some bits of the menu system are not too obvious without the book. Changing stuff like the duration of the beep that signifies that the pack has recharged or whether the readout is in f-stops or watt/seconds isn’t too much of a problem but switching Skyport channels for the first time isn’t all that easy. Getting the hang of how the asymmetrical flash output works with two heads attached to one pack isn’t something is obvious either.

The manual is well written and it doesn’t take long to master these functions once you know what goes where and which button to press first. It isn’t second nature yet, but that will come soon. Much excitement has been generated by the LED modeling light and the idea that it can double as a video light. I have a pair of Canon EOS5D MkII bodies and am starting to shoot some video with them. The amount of fill light that these LEDs put out is very useful and I would argue that they give the Elinchrom a really strong market advantage over other systems. The real joy of this system is the light that it puts out.

The light quality is great in every measurable way. Every flash at a given setting gives out an identical amount of light and the colour of the light doesn’t change when you dial the power up or down. The colour temperature of the tubes seems to be about 5300K and so I have set up a custom balance on my cameras for that. The only light modifier that I’ve used with it so far has been an Elinchrom 40″ (100 cm) shoot through umbrella and my gut feeling is that I will use this combination a lot over the next few weeks. The maximum power output is 400 w/s and for my money that figure is accurate. More importantly, it seems to be more than 1 f-stop more powerful than my old Lumedyne 200 w/s outfits. There could be any number of reasons for this but the outcome remains that I have more power at my disposal than I had before. Having the audible charge indicator is great and being able to turn it off is also a bonus. I have already made use of that function on more than occasion. The recycle time is a little slower than the Lumedyne 200 w/s kit and I found on the first couple of shoots that this was a possible issue. It has gone away now and I am getting used to the extra half second delay – especially when using the audible indicator.

The final point that I wanted to make was about the Skyport system. The pack has a Skyport receiver built-in as well as a synch socket (3.5 jack) and an optical slave. My kit came with a single skyport trigger and I have bought a second one along with a receiver that will work with either a Canon speedlight or one of my old Vivitar 285s. The system seems to work very well and I am not missing my Pocket Wizards enough to get them out of the boot and connect them up. My only criticism of the Skyports is that the transmitters don’t lock into your hot shoe and can be knocked out relatively easily. I’d like to see a transmitter with a lever style lock on the market from Elinchrom so that the system is foolproof rather than just very good.

In practice, 400 watt/seconds is quite a lot of power. Whether it is enough for every eventuality is debatable but in 32 months I have only found it wanting (by a stop or two at most) on two occasions and even then I made it work. Most of my work is portraiture and most of that is lit with this system and I have a real confidence in the kit that makes doing my job a lot easier.

If I were designing this system from scratch I would probably have not bothered with the complete miniaturisation of the heads. I think that I would have gone for a larger head with the standard Elinchrom bayonet fit and a stronger tilt mechanism. Of course that is based entirely on the way that I work and what I use the kit for. I have got used to the tiny heads and, for me, it would make sense for Elinchrom to bring out a version of the head built into the larger Ranger housing as well as this small version. That would eliminate any issues with adaptors as well as maximum umbrella size. It would also remove the need to only use Elinchrom’s own narrower shafted umbrellas.

The newer version of the Skyport trigger solved one problem and introduced a different one. It now stays in the shoe nicely but the words are now moulded in instead of being painted on which makes actually changing some settings quite tricky in low light. I’d also prefer a slightly larger version of the trigger with easier to change channels, a battery level indicator, AA or AAA batteries and at least 50% more range.

In my 2009 review I was confident that I would learn all of the functions and not need to bring the manual with me. I was WRONG. I have never completely mastered the menu system and I have a paper version of the instructions in the case as well as a PDF version on my iPhone. I don’t need to consult it often but when I want to do something in the menu it is helpful to have the manual there with me.

Conclusions:

In May 2009 I was “a happy bunny”. Not much has changed there. Actually, nothing has changed there.

I have some minor niggles but I still love using the Elinchrom Ranger Quadra and I would still advise any photographer in the market for a portable battery powered system to strongly consider it. In value for money terms, it is hard to beat. In light quality terms it is excellent and it passes the most important test of all – it is portable enough to actually take with you, even if you are a photographer working alone and a long way from the car.

If the folks at Elinca came to me with their notebooks and asked me to advise them where to take this system next, I’d be very happy to talk to them. This is a 9/10 product for the kind of work that I do. I have even used my own kit a dozen times when teaching location lighting courses with groups of six to eight people and nobody has managed to break it. I’m glad that the version two pack is better than my nearly three year old one which makes it even easier for me to recommend. There are half a dozen accessories that I would find useful – ranging from an adapter to be able to use a Canon or Nikon Speedlight with the Elinchrom bayonet mount accessories to a properly fitted rain jacket for the pack and a mains AC battery eliminator for when I am using the kit indoors for long periods.
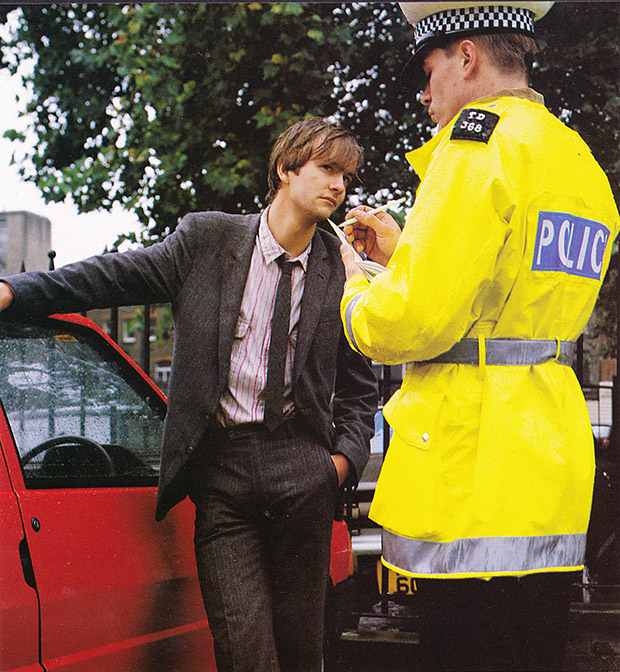
Posed by model – my revenge…

Jez Coulson is a great photographer and he is one of my oldest friends in the industry. We went to college together, shared a house and even started a business together – you get the picture, we are friends. A few days ago he was obviously looking through some old pictures and stumbled across one of me that he shot for a brochure. I was “posed by model” playing the part of a young, upwardly mobile, business type talking loudly on his old Motorola mobile phone on a train back in either 1987 or 1988. You can read his blog post here.

The thing is that we often acted as models for each other’s commercial shoots – which was a good way to put a few pounds in each other’s pockets when we were starting out. It happened all of the time and we used a lot of other friends and colleagues for the same purpose. We didn’t really do it on editorial shoots (unless the pictures were captions “POSED BY MODEL”) and definitely not on news jobs.

Anyway, Jez posted a picture of a twenty-something me in a suit so I thought that I’d do the same. This was a brochure for an insurance company who covered employees against legal issues and this picture shows Jez leaning on a car that happened to be parked outside our office (no idea whose it was) being given a good talking to by another friend, Peter Anderson, wearing a rented traffic police uniform. Enjoy…

©Neil Turner. London, March 1988

©Neil Turner. London, March 1988

Geek stuff: Shot on 5″x4″ colour transparency Fuji RDP film on an Arca Swiss View camera with a 150mm Rodenstock lens, available light.

Archive photo: Carl Djerassi, London, June 1999

©Neil Turner/TSL. London, June 1999

I shot this portrait of Carl Djerassi, co-inventor of the contraceptive pill, scientist and playwright in his London flat. He was mainly resident in San Francisco but kept a home in the UK as well. He was a very quiet and considered man who was used to, but not particularly keen on, publicity. I was attracted to the shape of his dining chairs and the almost egg-like shape of the top. I don’t recall whether we discussed the shape at the time!

Objects of desire

One of the great joys of being a photographer is the wonderful array of gear, technology and toys we get to use on a daily basis. It is also one of the curses of being in business. If I went out and bought every new camera, every new lens, every new application and every new computer that I fancied I would have no home, no car and no life.

That doesn’t stop me looking. The CES show in the USA has thrown up lots of new “I want one of those” moments and a quick calculation says that I would make a £20,000 hole in my finances if I went and bought it all. The serious point here is that for many photography is a hobby and buying new gear is a matter of “I want it, I’m going to have it”. For professional photographers there is a simpler test which asks “will that piece of kit pay for itself, pay my bills and work how it’s supposed to work?”

I’ve said many times that a lot of my clearest thinking comes from teaching and I’m currently updating my notes for teaching some business studies to my NCTJ Photojournalism group at Up To Speed Media in Bournemouth. In many ways the formula is simple: A. you need to take the cost of purchasing the item, insuring and servicing it and divide that by B. the number of days you work in an average year. Dividing A by B gives you C. To get the final figure D. You decide how many years the item might remain useful (longer for lenses, less time for camera bodies, computers and software).  Finally, you divide C by D and that figure is the cost of that piece of kit per working day.

An example: Telephoto zoom lens

  • A. price paid is £1,400 and it adds £20 a year to your insurance and a further £30 a year to service. That’s a total of £1,450
  • B . working 3 days a week on average over a 52 week year. That’s a total of 156 days
  • C. that’s 1,450 ÷ 156 = £9.29
  • D. lenses last on average 3 years

The final figure for owning that particular lens is £3.09 per working day IF you shoot for 468 days over three years. The cost goes down if you work more and it goes up if you work less. Of course one lens isn’t much use without the rest of the kit and so you can go through your whole stash of gear and do the same calculation for each. I tend to go for 2 years for camera bodies and computers, 3 years for heavy use lenses, 5 years for light use lenses and only 1 year for software including upgrades.

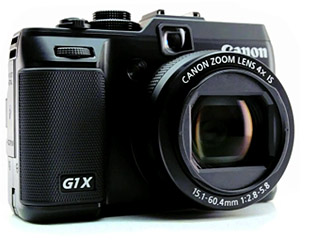
How depressing was that? Let’s end on a lighter note: objects of desire… well… the Canon G1X looks very, very cool, as does the limited edition all black Fujifilm X100. Of course the Canon EOS1DX has to go on the list and I’d love to give the Nikon D4 (and a kit of lenses) a spin. The list is actually a lot longer but nobody reads this far down… do they?

Advice for UK freelancers

Yesterday and today have been largely spent doing accounts. Three months worth of VAT return and my tax return for 2010/2011 (year 3 as a freelance this time around). I feel pretty confident that I have got the numbers right thanks to a combination of decent invoicing software (Billings), some easy to use spreadsheets (Numbers) and a very nice calculator that was a free gift from Canon a few years ago (thanks Canon UK). All of this software and hardware is great but the one piece of advice that I would give to anyone starting out as a freelancer here in the United Kingdom is to book yourself onto as many of the free workshops and seminars that Her Majesty’s Revenue and Customs lay on as you can.

When I was having a month off between leaving my staff job and starting out as a freelancer I managed to get myself onto three of these very handy courses. The first was led by a former Tax Inspector and the theme of the seminar could have been subtitled “how to avoid getting a visit from one of my former colleagues”. The other people on the course were a couple of cab drivers, eBay traders, a golf teacher, a musician and a freelance administrator. Put simply, it was a half day course on the basics of being self-employed:

  • What records to keep
  • How to invoice people legally
  • What you could set against tax
  • What you couldn’t set against tax
  • The pros and cons of using a bookkeeper
  • What an accountant can do for you

A very useful day and at the end of it we were given the business card of the HMRC seminar leader so that we could ask him follow-up questions.

The second course was all about VAT and VAT registration. If you aren’t from the EU and you are wondering what VAT is, well it is Value Added Tax – similar to US sales tax I guess. The seminar leader on this one went through the advantages and disadvantages of registering voluntarily for people whose business turnover is below the limit at which you have to become registered as well as the various different schemes for calculating how much you have to pay the Government four times a year. There were people on the course who had no intention of registering unless that were forced to but the course is still useful because we all pay VAT on everything we buy and knowing how the system works is a big advantage.

The final course that I did was about how to fill in your annual tax return. These forms are legendarily complex and half a day spent with an expert gives you a fair amount of confidence that you can do it. Of course the other angle is that knowing about the form makes it easier to deal with an accountant if you use one. Again, the various options are covered and I left that course wanting to use the on-line systems for everything I do with HMRC.

You can get a couple of the course handouts here and you can book courses at your local tax centre on the telephone. Three half-days doesn’t make you a bookkeeper or an accountant but what they do provide is a sound basic grounding from which it is a lot easier to move forward. The vast majority of photographers that I know are, or have been, self-employed and almost all of them would have benefited from doing these seminars.

In praise of Photo Mechanic

Every software package has its fans, its designers and its detractors. If we all loved the same system then there would be no choice. I wanted to blog about Photo Mechanic and to say how much I like it. That isn’t to say that the others are rubbish – that would childish and purile – just that I find this one application suits me and what I do extremely well. So what is Photo Mechanic? I thought that the description on the company’s own website was hard to beat:

Photo Mechanic is a standalone image browser and workflow accelerator that lets you view your digital photos with convenience and speed. Photo Mechanic displays your “thumbnails” in a familiar “contact sheet” display window. Photo Mechanic helps you find the best photo amongst several similar shots in a preview display that lets you flip through a group of selected photos at high resolution.

Photo Mechanic’s super fast browsing enables you to quickly compare multiple images and select the best ones from a sequence. Its powerful batch processing, full support for image variables, IPTC and Exif metadata, make it the perfect tool for any digital photographer.

Before this becomes an advert and a love-in, there are a few tiny issues with the current (4.6.8) version that I’d love to get sorted. The trouble is that we quickly revert to the “love-in” because the team at Camerabits who design, code and sell Photo Mechanic are second-to-none when it comes to listening to the views, issues and suggestions of their customers. Got a problem? Email Camerabits and nine times out of ten they sort it the same day and the other one out of ten times sees a resolution in the next upgrade.

Screen grab of a Photo Mechanic "contact sheet" window.

Anyway, what do I use it for? Photo Mechanic is the package that I use to import RAW images from my memory cards, edit out the bad pictures, IPTC caption, batch rename, edit again and then send the selected RAW files to my RAW converter of choice (which happens to be ACR in Photoshop CS5.5 but that isn’t important right now). Once the files are converted there they are right back in Photo Mechanic where I can save them to a separate folder, create HTML web galleries, burn discs, FTP or email images to clients or pretty much whatever I might need to do with photographs.

I can hear people saying that there are plenty of packages that can do all or some of the above and even ones that remove the need for a separate RAW converter – all true, but that misses the point. I want my workflow to be fast, repeatable, adaptable and generally hassle free. I want to rely on the trackpad or the mouse as little as possible and have a good, strong set of keyboard shortcuts instead. Bingo – that’s what I get from Photo Mechanic.

In an earlier post I talked about how teaching helps you to get your own practice right and this is very true with using software. If I had to work without Photo Mechanic tomorrow I have a good knowledge of Apple’s Aperture and a very good knowledge of Lightroom and I would never try to dissuade anyone from using those packages. Having had to buy and learn other software has made me appreciate what I have.

The Camerabits website says that version 5 of the software is due in the early part of 2012 and that there will be a separate but interconnected cataloguing application available too. That’s two things from my wish list sorted out – all we need now is a version of Photo Mechanic for the Apple iOS and that would be another thing ticked off that list.

Fun photo: Free cash machine

If only…

Moordown, Bournemouth. ©Neil Turner, December 2011

Chicken or egg? Workflow or mess…

Which came first… the Chicken or the egg, digital imaging or workflow?

One of the rather brilliant side effects of teaching is that you had to look very long and hard at your own practice to make sure that it will stand up to the examination of younger and more eager minds. I have taught workflow on and off for a few years now and I have come to the conclusion that all photographers should get theirs checked every once in a while to make sure that they haven’t fallen into the bad habits trap.

It doesn’t take much time and going through what you do and why you do it with an experienced teacher of these things is a great idea. I have also discovered how useful having a go at a proper edit of someone else’s pictures can be. Photographers are rarely their own best editors and it is a brilliant exercise to do an edit of a job where you give no attention to including pictures just because were hard to take or to pictures that you really like but don’t help tell the story. Captioning should also be part of that exercise because we all make assumptions when we do our IPTC that a disinterested party wouldn’t make. All in all, I thoroughly recommend these exercises to you.

In a rather tongue-in-cheek reference to the Alcoholics Anonymous “Twelve Step Plan” to beat addiction, I developed the photographers 12 step plan to get a good, dependable and repeatable workflow. It doesn’t matter that you can cut twelve steps down to seven or eight if you need to work fast and it really doesn’t matter that step twelve was “relax and put your feet up” anyway. What actually matters is that you have a tried and tested way of getting your valuable pictures from the camera to the client and back them up without making silly mistakes that cost you time, image quality and (worst of all) money.

For years I have been “quoting” the Hippocratic oath that Doctors and other medical folks take when they take up their calling. I have put “quoting” in inverted commas because it turns out that the phrase I have always used isn’t part of the oath at all – it’s just a line from a film!

Anyway I’ve been saying this; “First, do no harm”. It works for medicine and it certainly works for photographer workflows because the idea is that you never damage the original file – always working on a copy. Of course, with Jpegs that have had anything more than very light compression applied that means that you have already sacrificed some quality – but I don’t want to go down the whole RAW Vs Jpeg road again.

At some point in the future I will publish an updated version of the photographer’s 12 step plan with a step-by-step explanation of how my own workflow works but for now I wanted to just outline it. Remember that this can be edited down so that you have fewer steps if needs be:

  1. INGEST/IMPORT – get the images and any supporting files from the camera into the computer. Applications designed to ingest or import files look inside folders and sub-­folders on the memory card in a way that you might not be able to do by simply copying files from the card yourself. It’s important to note that this is one of the easier steps to cut out if you are in a real hurry.
  2. FIRST EDIT – make an initial selection of the images that you are interested in. At this stage you can dispense with very badly exposed frames, pictures where the focus has been missed, where important people have their eyes closed or pictures that are just not very good.
  3. COPY – move a copy of the selected images to a new folder.
  4. RENAME – give the selected pictures a new name. Some clients will have a formula that they want you to follow but otherwise try using a simple word identifier, followed by a six‐digit date and then a sequence number. All good software has the ability to batch rename and sequentially number files. A set of portraits of Tony Blair shot on the 3rd of April 2011 might be blair-­110403-­001 through to blair-­110403-­204. The exact formula that you pick isn’t as important as having one that works for you. The filenames that the camera assigns are not good enough and not unique enough for professional use.
  5. CAPTION – using the IPTC metadata fields to add information about what is in the picture, when and where it was taken and by whom it was taken. This is the best way to insure that your pictures can be found again – all image archiving and storage systems work with metadata.
  6. SECOND EDIT – narrowing the selection of images down to those that will make it into the final edit or the selection that will be delivered to the client.
  7. CONVERT – taking the RAW images from the final edit, making adjustment to colour, exposure, brightness, contrast etc using a RAW converter and then saving the toned images to the required file format.
  8. RETOUCH – opening the images into Adobe Photoshop or a similar application to remove dust spots, make subtle (but ethical) changes that cannot be made in the RAW converter, which, these days, are very few.
  9. SAVE – the final stage before sending to the client is to save the edit in the format that the client requires either JPEG or TIFF are most likely.
  10. DELIVER – most images these days are delivered using the internet. FTP is the most efficient but you may also be asked to email pictures, create web galleries, upload to third party viewing sites or simply burn everything to a disc and put them in the post.
  11. ARCHIVE – make sure that you back up copies of everything that you may need again. External hard drives, cloud storage systems and op?cal discs are the most common options. Multiple back ups are the best way to avoid losing your images due to the ageing of materials or the failure of drives.
  12. RELAX – that’s the end of the process!