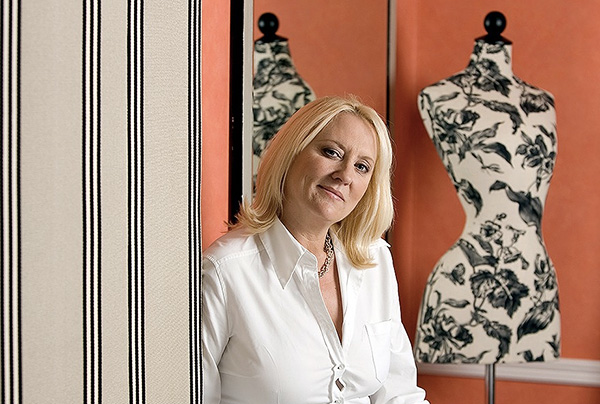
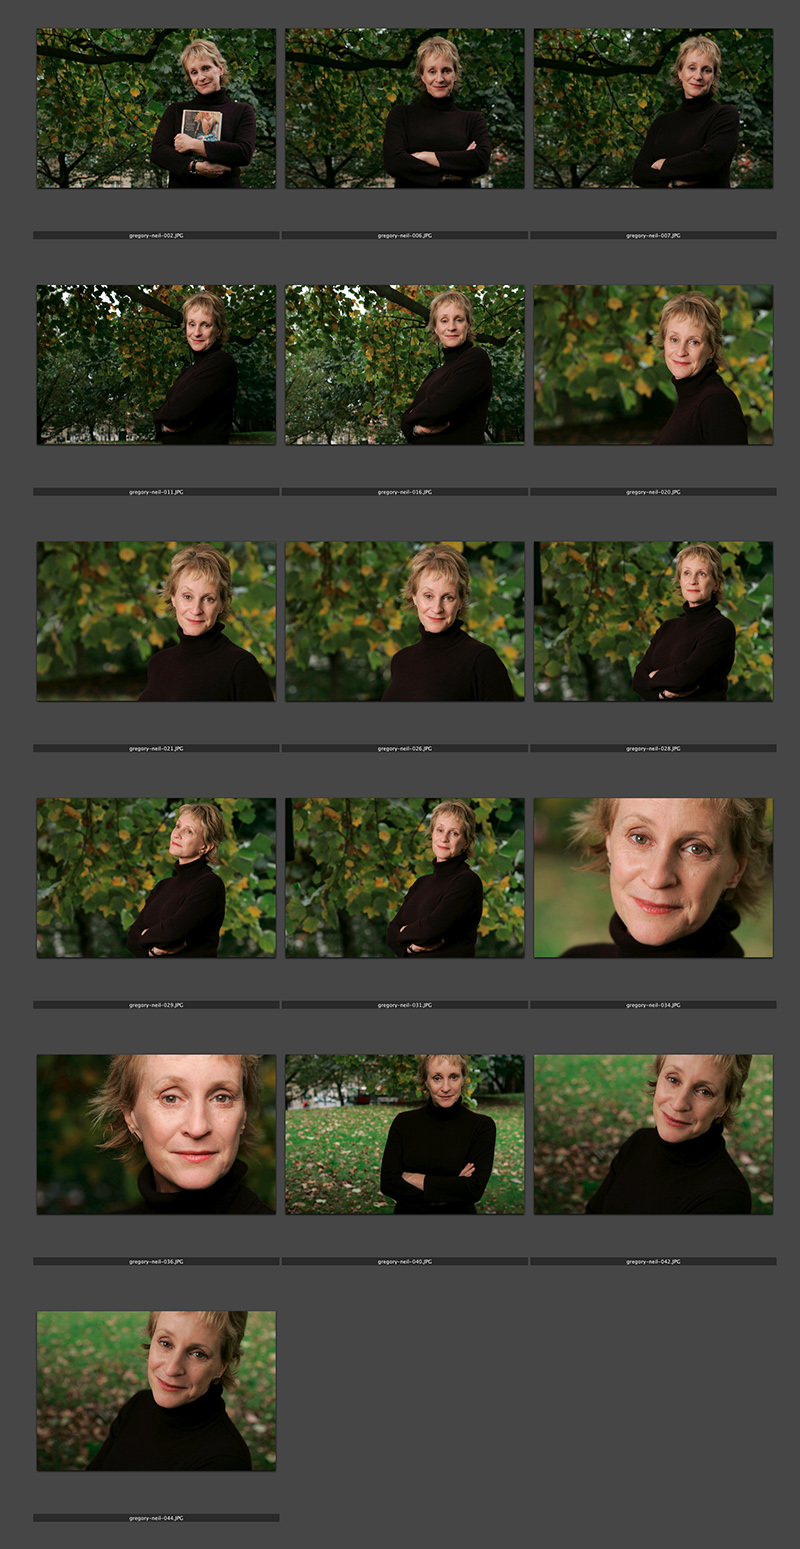
I haven’t done one of these contact sheets for a long time and I thought that this set was an interesting example. I submitted this set of sixteen pictures and they are all landscape in orientation. That’s because the slot they were shot for was across two pages and always a squarish landscape image. As I said in the previous post, the whole thing was done in ten minutes on a dull Autumn (fall) day in Hyde Park. That time included setting up and breaking down the Lumedyne light and chatting to the subject. Note that she is clutching her novel in the opening frame. I find that it’s always a good idea to do that if their publicist insists so that you can then go on to get the pictures that will actually get used.
work
The value of your online portfolio
I’ve had a web presence of some sort or other since 1999. First of all I was just dipping my digital toe in the water with some free web space and free software supplied by AOL when I was with them. That morphed into the original dg28.com website which was all about helping other photographers to understand light and lighting. Like most things we do in life, my site has grown and changed and it has mirrored my work – both have been through many changes to get to where I am now.
January as a freelance is traditionally a tough time – or so I’m told. One of my goals for this month has been to re-evaluate my online presence and to give my website both a freshen-up and to make it more iPad/iPhone/Android friendly. Work, happily, got in the way and so I haven’t got anywhere near finishing what I started. I have given a lot of thought to deciding exactly what the point of an online portfolio is:
- I know that I haven’t been inundated with work from it
- I’m sure that my SEO (search engine optimisation) isn’t state of the art
- My Google rankings by name are great
- My Google rankings by occupation, specialism, location and other useful factors are not great
- I know that it gets a lot of visitors because I have all of the relevant analytical data
Who are my visitors? Where do they come from? Why are they visiting my portfolio so much? Would they notice if it wasn’t there? Would my business suffer? Five very important questions to which I don’t know the definitive answers. That got me thinking and it got me going online to see what other people thought about the very same issue. Professional photography is unlike most other businesses – clients that I work with don’t order online and the amount of repeat business is good but not to the extent that we’d like it to be.
From digging around myself, chatting to friends, colleagues and a couple of web professionals and generally canvassing opinion I have come up with a few absolute truths and one or two bits of generally accepted notions by which changes and upgrades to my web presence are going to be governed in future:
- You have to have a web presence
- It has to be good
- It has to show your work off
- It has to be focused and demonstrate clearly who you are and what you do
- You have to assume that it is being looked at by the right people
- Probably fewer than 10% of the viewers are the right people
- Most of those ‘right people’ are there because they want to look at my work – they haven’t stumbled across my site randomly
So that means if I want to do more than one thing, I have to have more than one website. That means that I need to show pictures – the kind of pictures that I want people to notice, be impressed by and then to commission something along the same or similar lines.
By now I sense that most people who have read this far are saying “tell us something we didn’t know”. I apologise for being un-original but the truth is that there isn’t a magic formula – despite what SEO expert George keeps emailing to say. So where next? Should I invest money in getting a site built for me that is a bit better than I could build myself? What format should the pictures (because they are the most important thing on the site) be in?
In trying to answer those questions I have been looking at a lot of options ranging from template drive sites to slide shows to contact sheets to bespoke (and expensive) “wow” sites. As I get nearer to the end of the revamp process I find myself getting more and more apprehensive about the various options and technologies. So here is the thing… I have been playing with a software package called Wowslider and I have put a single test page together and asking for opinions and feedback about that page. So here it is www.dg28.com/folio/2013-01/ and I’d be very interested to hear opinions. I know this one thing for sure… what worked last year is probably very different from what will work next year and so January 2014 will probably see me going through this very process again. See you in twelve months time!
Rubbish on Oxford Street
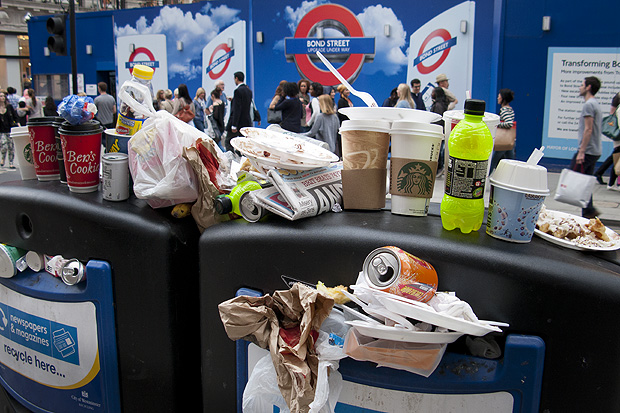
I was having a rare day off on Saturday and after a fantastic lunch in London’s China Town I walked up to Bond Street underground station to get a tube train back to where I am staying in Mile End. I usually carry a compact camera with me (still using my venerable Canon Powershot G9 most of the time) and just outside the station I saw this amazingly full and overflowing rubbish bin. It’s not often that I capture a compact camera picture that goes beyond the family album…
I took the picture “just because” but the more I looked at it, the more I realised that things like litter and other urban issues that don’t make the headlines absolutely fascinate me. My next thought was that images like this fill stock libraries and that I really should make more effort to shoot good generic images and submit them.
I’m no great fan of Westminster City Council who run this part of London but I admit that they have a tough job and you can see that the vast majority of the waste is fast-food wrappers and packaging. There probably isn’t an easy answer – they are fighting an uphill battle there and very little of the waste is dropped by local people. It’s a tourist area and a shoppers’ area and you might draw the conclusion that those two groups of people are less invested in keeping the place tidy.
I actually thought about labelling the post “off topic” but the I decided that as it’s my blog, I get to choose what the topic is!
Three months off from the day job.
It’s Monday morning and I’m sitting on the 06:25 train from Bournemouth to Waterloo for the first of many such trips over the next three months. I have decided to put the ‘day job’ aside and I’ve accepted a contract working in the Main Press Centre at the 2012 London Olympic Games.
When I’ve told people, the mixture of reactions has been very amusing. Ranging from the most common “how exciting!” via a liberal sprinkling of “are you mad?” to the rather predictable “can you get me some tickets?” The answers are, in turn: “I hope so”, “ask me in September” and “NO!”
Like most press photographers, I greeted the news that London was going to host the 2012 Olympics with a mixture of anticipation, horror and fascination. What would it mean for non-sports specialists like me? Would it mean anything beyond endless building works and some even-heavier-than-normal traffic? Until March of this year my only contact with the Games was to photograph a group of children whose school is right next to the Stratford campus in the Spring of 2008. Beyond that, I was expecting to have next to nothing to do with the biggest event to come to the capital in many years.
So what exactly will I be doing for the next 13 weeks? My job title says “Team Leader, Photographers Workroom, Main Press Centre” which is a posh way of saying that I will be there setting up and helping to run the vast work area at the main Olympic site set aside for visiting sports and press photographers. Customer service with a smile and a lot of empathy for the needs and deadlines of the 1800 or so accredited photographers that will be passing through the Olympic and Paralympic Games between now and the middle of September.
I’m excited – albeit in a slightly sluggish way having had to get up at 05:15. I am apprehensive too: this is a new departure for me in a career in photography that started way back in the mid 1980s. I’m genuinely looking forward to the experience and I hope, where possible, to say a few words every now and then about how things are going. If you are working at London 2012 yourself – please come and say “hello”. I expect that you’ll recognize me – I’ll be the one wearing the uniform, spinning plates, juggling press-packs and looking as if they know what they are doing.
My train is approaching London Waterloo and I’ve got to stick the laptop back into the bag for now.
Capture One Pro and other workflows…
One of the subjects that I teach is workflow. I know that I’ve mentioned that before but I thought that I’d remind you of that when I explain why and how I have been learning all about Capture One Pro – the professional RAW conversion, tethered shooting and image enhancement tool from Phase One. I am on version 6.3.5 (the latest available) and this is the first time that I have seen it since version 4 a few years ago.
Principally designed to make the most of Phase One’s own imaging systems, it also works rather well with the whole gamut of professional file formats. I have been using it for quite a few days now and I thought that I’d post some thoughts on here.
Before I get down to my opinions on Capture One Pro I need to say that every piece of software that I’ve used has needed quite a long time to get used to and anyone who does “full reviews” based on a few hours of use is kidding both themselves and their readers. I also need to make it clear that I paid for this software and that I have absolutely no ties to Phase One.
I have now used Aperture, Lightroom, Photoshop, Photoshop Elements, Canon DPP, Graphics Converter and a few others and Capture One Pro is probably the easiest of the lot to get to like. My knowledge of Adobe Camera RAW in Photoshop has been gained over many years and many thousands of edits and it has only taken me a few days to feel almost as comfortable with Capture One. I’m still learning more and the more that I learn the more I like it. That isn’t always true of new software packages – even if you really want to like them…
I like lots of things about the way it works, about the interface and about how good the customer support and instruction manual are. Every time I think that I’ve found a flaw in the feature set of this software I search the knowledge bank or put a note on Twitter and there it is – the answer that tells me that everything I wanted was there all along. That is great but there seems to be one feature from Adobe Camera RAW that I use all of the time that isn’t there with Capture One Pro – good and accurate profiles of all of my Canon lenses ready to apply corrections.
My first impressions of the user interface centred around my inability to find the tools that I actually wanted. I knew that most were there because the literature told me they were and a very brief exchange on Twitter with the workflow genius that is Nick Wilcox-Brown let me know how to find them and add them to my custom user interface or “workspace” as the application calls it. Better still, you can create a range of custom workspaces and save them alongside the suggested ones for dual monitors, simple workflow, black & white or even a replica of the previous version (5) of the software. Being able to customise the workspace is not unique to this application but I believe that they have implemented it really well.
All of the adjustments and all of the options have easily controlled and finely adjustable controls (mostly sliders) and I found myself easing very quickly into the Phase One way of doing things.
Time for a short list of likes:
- Customisable user interface
- Easy to learn how to use
- Extraordinary range of functions
- Tethered shooting
- Fantastic image quality
- Value for money
- Web contact sheets
- Output of files to specific sizes
… and dislikes
- Cannot find profiles for my Canon lenses
- The sessions menus
- Applying adjustment “recipes” seems hit and miss
- The way that it handles IPTC metadata (I know that the sister app Media Pro does that better)
- Speed of processing batches of files
- Not recognising the simple tags that I can apply in camera or by using the ‘tag’ function in Photo Mechanic
That is a short list of dislikes and you have to actually use it to decide if you agree about the sessions menus – the way that Capture One likes to create a virtual time bubble for each job in much the same way that Aperture does by default. I may be doing something wrong when I’m trying to create, save and apply “recipes” which are a great idea (again shared with Aperture and others) that allow you to copy all of the adjustments that you have applied to one image to one or more others as well as keeping that set of adjustments for future use/adaptation. Sometimes the recipes worked and other times they didn’t.
My background is in news and editorial photography and IPTC metadata is a fundamental requirement for me and it forms a big part of my own workflow and the personal workflows of people that I work with when I’m doing coaching. Capture One Pro handles IPTC and is compliant with all of the IPTC fundamentals – it just doesn’t do it very well. The same can be said for quite a few image processing applications and I still love good old Photo Mechanic for the speed, accuracy and flexible way that it handles everything except RAW conversions and long term storage.
My final dislike is the speed when processing batches of files. On a two year old Apple MacBook Pro with an i5 2.4Ghz processor, 8GB or RAM it takes 50-60% longer to process a batch of 36 CR2 images from a Canon EOS5D MkII than Adobe Camera RAW inside Photoshop CS5 does. Individual files are shot through in almost the same time but batches are slower. I tried very hard to be scientific when comparing like with like but I am prepared to be proved wrong on this.
This isn’t really a full review – just some thoughts on an application that I am sure to have to teach very soon. Several people have already asked what advantages Capture One would give them over Lightroom or Adobe Camera RAW in Photoshop and, to be honest, I couldn’t really name any. If you already use and are happy with either Adobe product for processing RAW files then it doesn’t really make sense to spend more money and get Capture One Pro. BUT (and it is a but worthy of being in upper case) if you are looking at designing a new workflow for news and editorial work from the ground up and you don’t already have licenses for anything else I would strongly recommend getting Capture One Pro and using it in tandem with Photo Mechanic. Between the two you have a solid, reliable and well priced set of options that will, without doubt, deliver the goods. That would leave you in need of an archiving option and for that Phase One’s Media Pro might be a good solution. There are those who’d argue that between the two Phase One applications you have everything you’d need and they would be right but there is no getting away from the fact that Photo Mechanic does what it does so well that it is worth the money and then some. The same goes for Capture One Pro too.
Re-working old files
With all of the time that I have spent recently trying to get used to the beta versions of Photoshop CS6 and Adobe Camera RAW 7 I have been having quite a few conversations on forums and over email with others going through the same process. One conversation led me to think about even older versions of the software and how I used them and in turn that got thinking about finding an old CR2 two file that I was never truly happy with and having another go with the up-to-date version of ACR. Without looking at the original “finished” JPEG I grabbed a CR2 file from 2008 that I remember being unhappy with and gave it “the treatment”.
Whilst I was doing the conversion it became obvious to me that I wasn’t really comparing versions of the software – it was that my taste in the way images look has changed. I have no doubt that knowing far more about converting RAW files than I did four years ago helps enormously. You can also factor in the improvements in the adjustment tools available as well but the sum total of all of that means that the newer version is far more subtle and (in my eyes) far better. I made use of the fill-light and the graduated filters. I used a much warmer white balance and my approach to both noise reduction and sharpening has moved on too – although you’d never notice that from these 620 pixel samples.
So there we go. If it wasn’t blindingly obvious before, it is now. RAW conversions depend on a mixture of software and taste and this little experiment has proved to me that my tastes have changed and so, therefore, must the tastes of other people. The final conclusion has to be that every time you create a new folio, make changes to your website or supply a picture you have to make a choice between re-working the files to bring everything up to they way you like things now or leave well alone and allow your images to be “of their time”. Fat chance of the latter happening here…
Get yourself some defaults
Surprise, surprise – yet another blog post in response to a question! I was asked “what one single piece of advice could I give to someone who had already read the previous “one piece of advice” blog post on here?”
That’s a really cheeky and rather good question and, having shot myself in both feet by saying that I was a sucker for people who used please and thank you I felt duty bound to answer.
In three words I’d say “default staring point”. What’s that? you ask… “Good question” I respond. It is the notion that every time you go to do something you have two choices: you can mess about working out where to start and what to do first OR you can go to your default starting point and get stuck in straight away.
In photography this takes a wide variety of forms. For example, when I’m shooting a lot portrait my default position for placing a light is parallel to my subject’s torso – imaging that their chest is one line and the front of my light source is another, those two line would be parallel. Another example is “what gear shall I use today” the answer (if you are lucky enough to have sufficient kit that you need to choose) is my default kit: two 5D MkII bodies with 24-70 and 70-200 f2.8L lenses and a couple of 580exII flashes in the bag with a 16-35 “just in case”.
Every part of the job has a default setting. From the preferences locked into Photo Mechanic and Adobe Camera RAW to leaving my cameras on daylight white balance and 200 ISO. Default starting positions. I know that if I start there I can move away as soon as my imagination starts to flow and as soon as I start to get a feel for the situation. Sometimes the defaults get changed with seconds but it is amazing how often they stay a lot longer.
One photographer I explained this concept to a few years ago compared it to putting his left sock on first, followed by his right sock and then his trousers. No real reason why, it just means that you can concentrate on the interesting stuff safe in the knowledge that you have the basics covered.
When you really start to think about it we all have defaults in every area of our lives. Toothpaste onto wet brush, small amount of cold water onto that and away I go. Why would I do it any other way? Off to shoot a portrait, tightish head shots on a long lens first to avoid spooking the subject and then gradually get closer and wider. It makes sense to me and that’s my default.
I could go on with the list but I’m guessing that you have the idea by now. A default starting position for everything just helps you to organise your thoughts and get stuff done. Good advice?
A nice request for a picture
A few weeks ago I received a lovely email from the widow of a philosopher that I had photographed back in 1996. She had been looking through some of his papers and found a cutting from the Times Higher Education Supplement that had an interview with him along with my portrait of him. She saw the tiny 8 point byline and knowing that search engines are wonderful things she tracked me down. Emails went back and forth and today I got a photocopy of the cutting in the post.
I don’t have much of the work that I did between 1994 and 1998 but her luck was in and I had a Kodak Photo CD with some half decent scans from the job in my loft. It was an easy enough task to find the CD, grab the relevant image from it and get it ready to send to her. The old Kodak Photo CDs used an unusual and proprietary format that Photoshop doesn’t recognise so if anyone else comes across this issue I can confirm that the old Graphics Converter application will happily handle the format and convert your files into useful formats such as PSD, TIF or JPG.
Like most photographers I get regular requests for ‘free’ pictures and I am always wary but somehow a hand-written note from the widow of a very nice man where the words “please” and “thank you” chased away my cynicism rather easily. The portrait is of philosopher and Oxford Professor Bernard Williams (he became Sir Bernard a while after I shot the picture) and here it is…
Geek footnote: I was using a pair of Canon EOS1n bodies with Canon 28-70 f2.8L and 70-200 f2.8L lenses at the time and this was almost certainly shot on the 70-200. The film was Fuji 200 ISO colour negative scanned on a Kodak RFS scanner.