Editorial

Bouncing balls, hosepipes and shadow puppets.

This is not an attempt to secure higher rankings by filling the title full of potential seedy euphemisms. I came up with the title when I was teaching a flash workshop this morning and I was trying hard to come up with ways of explaining some very basic concepts regarding the best way to think about how best to use light.

We all know what bounce flash is and most of us use it from time to time. It isn’t a difficult concept to explain either but I have always referred to school science lessons (Physics in my case) when explaining the best way to angle a flash to get the optimum effect. That drew a couple of blank stares today and I had to come up with an alternative (and it appears better) way to explain it. I’m convinced that this isn’t an original concept but I came up with the bouncing ball; simply put, if you stand two people three metres apart (or 2.8 metres for anyone who has ever been to one of my seminars) and one of them wants to bounce a ball to the other and have it reach them at the same height it left at then the optimum point for the bounce is 1.5 metres from the thrower or 1.5 metres from the receiver or exactly half way. The same goes with flash; point the flash at a midway point and you will get the greatest amount of light.

Of course that doesn’t tell the whole story… and thats where the hosepipe comes in. It is entirely possible that bouncing the light at the half-way point isn’t desirable because there is a chance that the angle of the reflector on the flash means that some light will actually hit the subject without having been bounced – light from the very edge of the flash. If you imagine a powerful hosepipe and pointing the stream of water at the wall the water will mostly bounce in the same way that a rubber ball might but the spray of the water will fan out in the same way that flash light does. If your object is to soak the subject, you aim the hose directly at them. If you have to bounce it, then you pick the halfway point. If you want to get them wet without the water going where you don’t want it to go then you pick an aiming point which might not provide the greatest amount of water but will allow you the most control. Obviously, the same goes for light. Direct flash might give you f16 and the halfway point bounce might reduce that to f8 but the nicest light might be a couple of f-stops weaker still at f4 but that might not actually matter.

©Neil Turner, October 2010. Bouncing flash off of a warm-toned brick wall.

©Neil Turner, October 2010. Bouncing flash off of a warm-toned brick wall.

Put simply we are talking about the difference between quantity and quality of light. By deliberately avoiding using the most efficient bounce we often end up with a more pleasing light quality. I often bounce off of walls and surfaces six, seven, eight or more metres away and for that you need to make the bounce as efficient as you can but when the wall is only three or four metres away you have many more options. Suddenly efficiency isn’t the main concern and you can often sacrifice some quantity in favour of quality.

One of my favourite ways of teaching bounce flash is to pick very unlikely surfaces such as wood panelling or brick walls and bounce the flash off of those. Of course you often get a colour caste but a good bit of RAW shooting and/or custom white balancing will sort that out pretty quickly. Above is a sample of a picture shot bouncing the flash off of some yellow-coloured medium toned bricks. It was taken at a University a couple of years ago when I was working on a project with some very cool students.

So what about shadow puppets? Well, we were also talking about creative options and casting deliberate shadows in all sorts of shapes and the best way that I could demonstrate was to throw shadow puppet type shapes in front of the digital projector onto the screen. You can make all sorts of cool shapes from card, through venetian blinds, through windows and doors and even through the back of a wooden chair. If you get the light right, you can do some very creative stuff and all with a basic flash unit off camera.

During lighting workshops I talk about a lot of other stuff but I was amused that in one day I came up with three new ways (new to me that is) of explaining techniques and concepts – techniques and concepts that I normally have no problem describing by referring the school science lessons. Maybe they aren’t teaching science in the same ways that people my age remember any more.

The value of your online portfolio

martina_cole

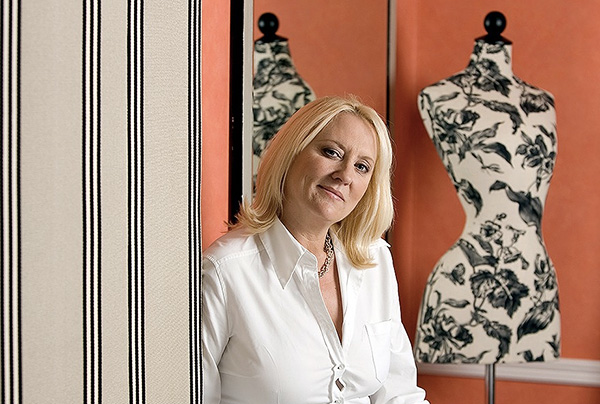
Crime writer Martina Cole photographed at a London hotel © Neil Turner/TSL

I’ve had a web presence of some sort or other since 1999. First of all I was just dipping my digital toe in the water with some free web space and free software supplied by AOL when I was with them. That morphed into the original dg28.com website which was all about helping other photographers to understand light and lighting. Like most things we do in life, my site has grown and changed and it has mirrored my work – both have been through many changes to get to where I am now.

January as a freelance is traditionally a tough time – or so I’m told. One of my goals for this month has been to re-evaluate my online presence and to give my website both a freshen-up and to make it more iPad/iPhone/Android friendly. Work, happily, got in the way and so I haven’t got anywhere near finishing what I started. I have given a lot of thought to deciding exactly what the point of an online portfolio is:

  • I know that I haven’t been inundated with work from it
  • I’m sure that my SEO (search engine optimisation) isn’t state of the art
  • My Google rankings by name are great
  • My Google rankings by occupation, specialism, location and other useful factors are not great
  • I know that it gets a lot of visitors because I have all of the relevant analytical data

Who are my visitors? Where do they come from? Why are they visiting my portfolio so much? Would they notice if it wasn’t there? Would my business suffer? Five very important questions to which I don’t know the definitive answers. That got me thinking and it got me going online to see what other people thought about the very same issue. Professional photography is unlike most other businesses – clients that I work with don’t order online and the amount of repeat business is good but not to the extent that we’d like it to be.

From digging around myself, chatting to friends, colleagues and a couple of web professionals and generally canvassing opinion I have come up with a few absolute truths and one or two bits of generally accepted notions by which changes and upgrades to my web presence are going to be governed in future:

  • You have to have a web presence
  • It has to be good
  • It has to show your work off
  • It has to be focused and demonstrate clearly who you are and what you do
  • You have to assume that it is being looked at by the right people
  • Probably fewer than 10% of the viewers are the right people
  • Most of those ‘right people’ are there because they want to look at my work – they haven’t stumbled across my site randomly

So that means if I want to do more than one thing, I have to have more than one website. That means that I need to show pictures – the kind of pictures that I want people to notice, be impressed by and then to commission something along the same or similar lines.

By now I sense that most people who have read this far are saying “tell us something we didn’t know”. I apologise for being un-original but the truth is that there isn’t a magic formula – despite what SEO expert George keeps emailing to say. So where next? Should I invest money in getting a site built for me that is a bit better than I could build myself? What format should the pictures (because they are the most important thing on the site) be in?

In trying to answer those questions I have been looking at a lot of options ranging from template drive sites to slide shows to contact sheets to bespoke (and expensive) “wow” sites. As I get nearer to the end of the revamp process I find myself getting more and more apprehensive about the various options and technologies. So here is the thing… I have been playing with a software package called Wowslider and I have put a single test page together and asking for opinions and feedback about that page. So here it is www.dg28.com/folio/2013-01/ and I’d be very interested to hear opinions. I know this one thing for sure… what worked last year is probably very different from what will work next year and so January 2014 will probably see me going through this very process again. See you in twelve months time!

Rubbish on Oxford Street

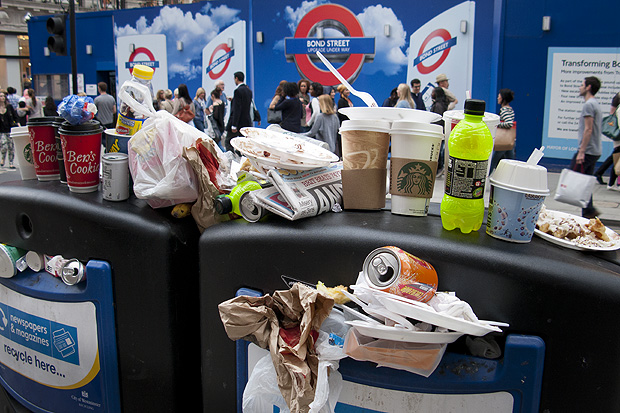
I was having a rare day off on Saturday and after a fantastic lunch in London’s China Town I walked up to Bond Street underground station to get a tube train back to where I am staying in Mile End. I usually carry a compact camera with me (still using my venerable Canon Powershot G9 most of the time) and just outside the station I saw this amazingly full and overflowing rubbish bin. It’s not often that I capture a compact camera picture that goes beyond the family album…

©Neil Turner. Oxford Street, London July 2012.

I took the picture “just because” but the more I looked at it, the more I realised that things like litter and other urban issues that don’t make the headlines absolutely fascinate me. My next thought was that images like this fill stock libraries and that I really should make more effort to shoot good generic images and submit them.

I’m no great fan of Westminster City Council who run this part of London but I admit that they have a tough job and you can see that the vast majority of the waste is fast-food wrappers and packaging. There probably isn’t an easy answer – they are fighting an uphill battle there and very little of the waste is dropped by local people. It’s a tourist area and a shoppers’ area and you might draw the conclusion that those two groups of people are less invested in keeping the place tidy.

I actually thought about labelling the post “off topic” but the  I decided that as it’s my blog, I get to choose what the topic is!

On test: Vanguard Heralder 38 camera bag

When somebody offers me the chance to try out a new camera bag that is winning awards all over the place, I normally jump at that chance. An email from the people behind the Vanguard range of bags arrived in my inbox a few weeks ago and the Heralder 38 arrived at my home shortly afterwards. I have tried so many rucksack bags and been disappointed with the compromises that you have to make in order to get portability and so I keep coming back to shoulder bags – despite the best advice of people who know about back pain.
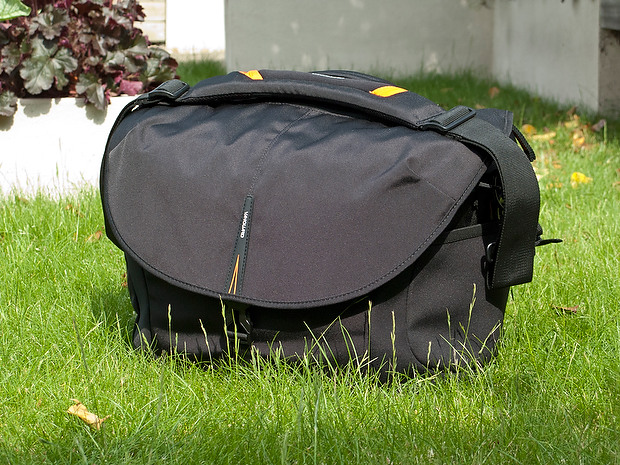
The Vanguard Heralder 38 camera kit + laptop shoulder bag.

Lets put this bag into some sort of context: I have used a Lowe Pro Stealth 650 as my main “carry everything” shoulder bag for many years now and I am used to it, quite like it and would buy the same again to replace it if Lowe Pro hadn’t done what they seem to love doing – which is to take a perfectly good design and “improve” it. The old Stealth 650 that I have is a good bag but the new Stealth 650 is really annoying!

Anyway, back to the review: The way that I test things is to use them in my everyday work and so the amount of testing depends entirely on what I’m up to at any given time. The last couple of weeks have been relatively quiet but I have had enough days out with this bag to have made a lot of important decisions about it. From my own experience of reading reviews, I know that a lot of people skip straight to the end and because of that there will be a “conclusions” section at the bottom.

Most people want their camera bags to be smaller than they need to be, to weigh less than the total of everything that they want to jam in, have super-easy access, look great and to be a joy to carry for several hours. I guess that’s why nobody has ever found the perfect bag. It’s impossible to make that bag on a commercial level because we all have subtly different needs and so the word compromise rears it’s head AGAIN!

What can you get in the bag?

If this bag is going to become my everyday carry everything bag then it needs to swallow my standard amount of kit: Two Canon EOS5D MkII bodies, 16-35 f2.8L, 24-70 f2.8L and 70-200 f2.8L lenses, two 580exII flash units and all of the bits, pieces and accessories that go to support that kit in the field. I also need to put either a 15.4″ Apple MacBook Pro or an 11″ MacBook Air plus gadgets in from time to time. The good news is that everything fits in and the bonus is that I can just fit the 70-200 standing up with its lens hood in place (I hate having to remove and reverse hoods every time you put a lens away).
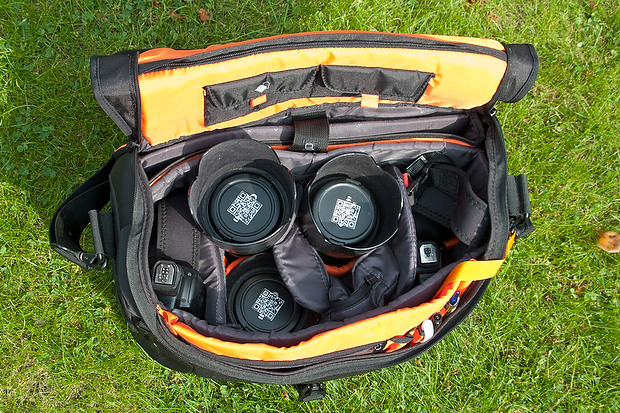
The Heralder 38 showing how my standard kit is laid out when loaded into it.

The bag itself doesn’t have too many pockets and hiding places for anything other than relatively small or flat items such as pens (x3), memory cards (x4) notebooks, passes and business cards. What it does have is a removable pouch which holds a couple of spare batteries for the camera, a couple of spare sets of AAs for the flash units and an electronic release for the camera. Because of this pouch and the excellent use of space within the main compartment of the bag the Heralder 38 passes this test rather comfortably – even with a laptop and related accessories on board.

Ease of Access
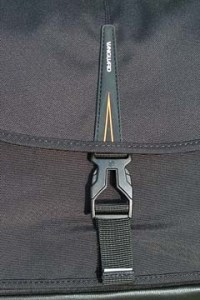
That less than perfect clip…

Shoulder bags are nearly always nicer to work from that rucksacks or rolling cases. I prefer my bags to have a simple method of closing them whilst working and a more secure method for securing the contents when I am simply travelling. The combination of a zip around the whole lid and a single snap-shut clip on this bag meets that requirement too. I suspect that the designers of this model have looked at the old LowePro Stealth bags and decided that they were on to something before designing their own similar solution.

It’s at this point that I found my first ‘issue’ with the Heralder 38. I like to be able to close the bag in work mode one handed. Every Domke and LowePro I have ever owned has the ability to do this in common and the Vanguard looks as if this wouldn’t be a problem either. So far I have struggled like mad with the plastic snap-shut clip fitted to this bag and I cannot work out why. I cannot seem to line it up as easily as the more square ones on my LowePro or on the Think Tank roller that now carries my lights everywhere. I’m still trying to master this clip and failing.

Beyond that niggle, getting kit in and out of the bag whilst moving is as easy as it has ever been on a bag that I’ve used. If they could source a less trendy looking clip I’d be well on the way to proclaiming this bag a massive success.

Carrying the bag

This is where the Heralder 38 comes into its own. Somehow they have made this a superbly comfortable bag to carry. The strap is excellent and the shape of the back of the bag means that it sits on my hip incredibly well. Vanguard have gone some of the way to fooling me into thinking that I am carrying less dead weight than I actually am and that is a huge advantage for this bag when comparing it to the other bags of a similar size that I have owned and/or tried out. Put simply, this is an easy bag to carry – possibly the easiest I’ve ever used.

Extra features

All bags these days come with clips and straps that allow you to attach tripods, monopods and other large and unwieldy accessories. To be honest I never want to be in a position to have to do that and so the bits an pieces that came with this bag that allowed me to do that were removed (where possible) and put into a cupboard.

The bag features lots of handy labels…

What the bag does have (in common with my old LowePro) is a rain cover tucked away in the back of the bag that can be fitted to keep the contents drier than would otherwise be the case. We are in the middle of a spell of beautiful weather here in the south of England and so I haven’t had a chance to test the rain cover yet but I can tell you that it is fast to fit and easy to pack away again. The great news is that it is detachable too – which is a big tick from me. I have had other bags where the rain cover is permanently attached – which means that when it stops rainy you have to leave it out to dry or pack it away wet.

The bag comes with a very stylish luggage tag and an elasticated end pocket that fits a small bottle of water rather well. As someone who carries his bag on the left shoulder, the elasticated pocket is on the wrong end but that’s just a small niggle and not a deal-breaker!

Looks and construction

I guess that when you design a camera bag you have two choices: you either go down the “it’s a camera bag so it should look like one” route or go the other way and design something that looks like a normal holdall. This bag is squarely in the former camp – to the extent that it would be hard to imagine that it was anything else. The black water resistant materials are of a great quality and the plastic base appears to be pretty tough. The orange colour of the interior may be off-putting for some people and I’d prefer something 18% grey myself (like my old LowePro) but it has the advantage of being very visible from a distance and being the colours of The BPPA.

The quality of the stitching and the fabrics tells me that this bag should last a long time. If they put a better snap-shut clip on the bag I think that they will have the whole construction sorted.

Conclusions

This is a very good bag. It is OK to look at, swallows a lot of kit and is easy to work out of. It appears to be well made and the biggest selling point for me is that it is supremely comfortable to carry. The number of distributors for these bags seems to be growing and a quick search of the internet found the best price is as low as £124.98 at Amazon– which is good value for money as far as I’m concerned.
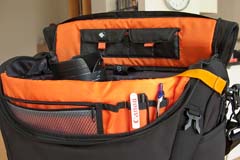
The Vanguard Heralder 38 in use.

So far I only have one real niggle: the snap-shut clip. Beyond that, for the first couple of days I thought that a couple of external pouches would be useful for when I have a few extra bits but I suspect that would alter the superb balance and usability of the bag rather than enhance it.

So that leads me to the big question: “Is this the best bag in its class that I have ever used?” The answer is very close… for portability and comfort of carrying the answer is a big yes. For ease of working is a marginal “no” BUT the bag that I would say beats this one has been modified by LowePro and the new version isn’t as pro’ friendly as the old one and so, if you needed to buy a shoulder bag to carry a decent amount of kit along with a laptop, I don’t know of anything that would beat the Vanguard Heralder 38. I haven’t found the camera bag equivalent of the holy grail yet but there is every chance that it is just a myth anyway.

Why do YOU take pictures?

Most of this blog is about the professional side of photography but, like a lot of people who make their living taking pictures, there is a passionate enthusiast inside me too. From time-to-time I get a lot of emails from keen amateurs asking me how they can improve their photography. The first answer is always “take more pictures” but beyond that it really helps to know what you are taking photographs and who the audience for those pictures is.

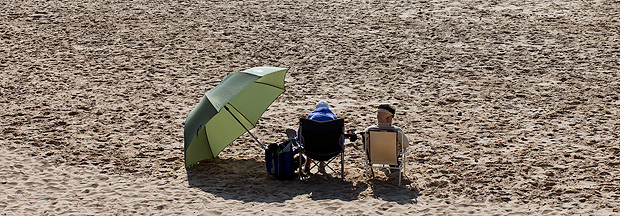
©Neil Turner. November 2011, Branksome Beach, Dorset. This picture was taken as part of a set to illustrate why the BH13 post code area is such a desirable place to live.

Defining who your audience is and realising what their requirements are is a huge step towards becoming a better photographer – especially if you care about what others make of your work. Of course there are many among us who would profess that they only take pictures for their own enjoyment and who don’t really care what other people think. I’m sure that those people exist but they are an incredibly tiny minority. The rest of us want to share our work, get feedback on it and (hopefully) have praise heaped upon it.

A few years ago I wrote an essay entitled “Commission Yourself” as an early attempt to give some direction and purpose to photographers who had a desire to be out there taking pictures but who struggled with what, when and why they were doing it.

It doesn’t matter if you are a professional photographer, a keen amateur or a weekend and holiday compact user – shoot the best pictures that you can. It is all a matter of approach so here is how I suggest you try to take pictures. There are a number of things that a professional photographer knows long before he or she starts to take pictures. The pro knows who the client is, what the end use of the pictures will be and what they will be taking pictures of. This enables them to “focus” on the job ahead, an approach that can easily be translated into the type of photography you do.

The “client” could be your partner or your children and you know that the pictures are destined for the family album. The pictures might be of a child’s birthday party. Already you are starting to think in a far clearer manner and you can concentrate on making a list of the important images. You could, for example, need a range of images that would fit accross a double page in the album. You need a shot of the birthday boy – maybe a nice tight one. You need some pictures of the guests – perhaps a wider picture with three or four revellers in it. Some smaller images of a cake and other guests and something with a bit of humour. A total of five or six images, shot from different heights and some tight, some wide. To get five or six good images you will need to shoot at least thirty pictures and on a digital you have wasted nothing by trying different things. You can print images to different sizes and edit on screen adding captions as you go.

By deciding what your goals are in advance you will actually spend less time just snapping and hoping. Next time you will know how well you did and what worked in the framework you set yourself and adjust your self-commission accordingly. It is one of the great ironies in photography that tighter briefs often make better pictures. I have never been able to just “go and take photographs”, but if I am looking for a something specific I nearly always get what I want.

As you become a better photographer you can learn to recognise what you like about certain images and trying to shoot in a given style becomes a great way of finding your own. So go out and commission yourself tomorrow and if nobody is having a party try to document your garden or street. Pick out details and shoot the wide picture – you’ll soon have your own photo story in the can.

Of course it is equally true that there are people out there who don’t really care about what they shoot; they just want to own and be seen with some very cool and expensive gadgets. I have met so many people with cameras over the years who can quote the features of their kit as if they had learned the brochure by heart but who don’t actually like taking pictures. Each to their own.

Another tactic for becoming a better photographer is to analyse and even mimic the pictures that we see from other photographers. Shooting street scenes in the style of Henri Cartier-Bresson or portraits in the style of Terence Donovan can be a real creative spur and sooner or later you will develop your own spin on those styles and start to move towards having your own way of shooting. There are fashions in photography related to specific lenses that you can follow and there is a constant cycle of effects doing the rounds that you can analyse and adopt if you need more inspiration. It’s all out there waiting. Light, subject matter and composition – master being able to assess those three elements in other photographers’ work and you will be well on your way to being a much better photographer.

Grumpy old photographers’ charter

I do a lot of seminar and teaching work these days and one of my most popular presentations is about professionalism. The talk is aimed at new entrants to the profession but it seems to go down well with photographers who have been around a while as well. I have even delivered the same talk to a group of lawyers because actually replacing the word ‘photographer’ with ‘lawyer’ brings a lot of the meaning around to the central idea that, in many ways, professionalism is the same no matter what you do for a living.

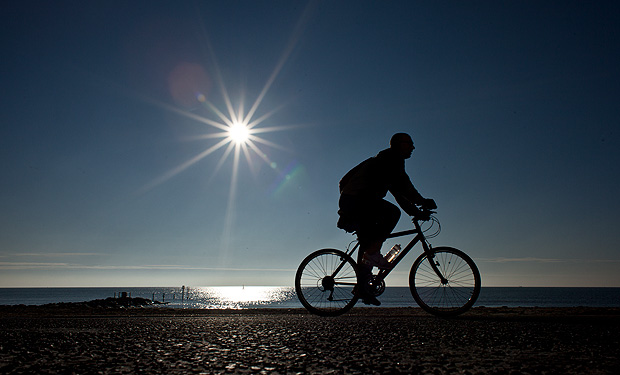
©Neil Turner. March 2009, Bournemouth Beach

The final part of the talk is a bit of a dig at myself and my peers. Those of us who have been in the job for a long time and who might just be getting a little complacent about things. I call this part of the talk “The five worst habits of those of us who should know better”:

1. Harking back to a golden age that may, or may not, have existed

It’s a simple idea really – we all look back with slightly misty eyes at the time a few years ago when things were good and before something new came along to spoil everything. Take your pick from the use of colour in newspapers, the whole move to digital, the adoption of multimedia by newspaper websites and several other developments in the industry. The truth is that when I was just starting out there were a few photographers who complained about the arrival of 35mm film and the loss of their beloved Rolleiflex cameras and even one or two who bemoaned the passing of half plate cameras and dark slides with sheet film. I reckon that every photographer has a ‘golden age’ that they look back at and that you can calculate when that was for each of us using a simple formula which compares how long the photographer has been working with when they got their first big front page and divide it all by the first major change in the industry that they went through. There never was a true golden age was there?

2. Forgetting why we came into the job in the first place

Easy to do this… most of us had a desire to tell stories, create arresting and beautiful pictures and to make the world a better place with our photography. Very few of us did it for the money, not many of us did it so that we could play with ever more expensive toys and only a tiny number came into it so that they could work unsocial hours and have to chase clients for money the whole time. If you take a step back and think about your original motivation and it isn’t there any more you really need to make your mind up about whether this is still the business that you want to be in. The older I get, the more I feel the need to shoot pictures that I want to shoot just to keep myself sane and sharp.

3. Failing to keep up with new business practices

“I’ve always done it that way, why should I change now?” is a common lament from photographers who are in trouble of getting it wrong. From the way you buy and use equipment to the way you store your archive and from the way you word your invoices to the way you put your portfolio together should be the subjects of constant review and possible change. Technology affects every single aspect of who we are and what we do and anyone who decides to stop keeping themselves up-to-date with what is happening is consigning themselves to a parallel dimension where they may get some work but where that might  be a temporary state on the road to going out of business.

4. Throwing money and effort into the latest thing

Exactly the opposite of the last problem really. Keeping abreast of developments and knowing where the market is a good idea whereas automatically jumping on every new idea, fad or fashion is not. So many new developments turn out to be ideas that don’t stand the test of time and too many of us have invested too much time and money chasing them. The worst way to do this is to assume that somebody younger and hipper than you automatically knows what to do – that, in my experience, is rarely the case. There’s always a middle-aged geek who you can ask…

5. Letting professionalism slip

Another thing that is far too easy to do. I know that I’ve done it – mainly through over-confidence. You have to remember the maxim that “professionalism is everything we do, everything we say and everything we produce” in our working lives. You can get too close to clients, you can cut corners in your workflow and you can rely too much on automated systems. This is far from a full list but it illustrates the potential pitfalls when it comes to losing our professional edge.

Being a professional photographer is a fulfilling and interesting way to make a living but we all need to remember that it is a profession and not a lucrative hobby. I’ve been wracking my brains to come up with a clever and punchy pay-off line for this blog post but I’ve struggled. I’ll just content myself with some advice: when things are feeling tough and not all all like the ‘old days’ just remember the five worst habits of those of us who should know better and if that doesn’t help… get some help!

Beach huts in the winter

A few months ago I wrote about shooting a magazine feature about “walking with speed lights” and promised to say a bit more in time. well, a promise is a promise…

There are days when I just want to go out and take pictures. Most of the time it really doesn’t matter what I’m shooting – as long as I can get my teeth into making the pictures as good as they can be. Winter in the United Kingdom can be pretty un-inspiring and if, like me, you love shooting people outdoors it can be a tough job getting people interested in being out in the cold – especially when there’s a strong chance of getting wet and probably having to be wrapped up in unflattering bad weather gear. A few months ago, in preparing a ‘technique” piece for a photography magazine I decided to go for a walk. The thing that made this an unusual walk is that I took some flash gear with me – nothing too heavy, a couple of Canon Speedlights and a couple of lightweight stands in a simple sling bag – and I decided to shoot anything that I thought would look better with the addition of some off-camera flash.

©Neil Turner, November 2010 – Bournemouth, Dorset.

I tried lots of different pictures but it was this composition that made me happy. One of my favourite spots growing up was a small headland between Bournemouth and Christchurch called Hengistbury Head where there is a nature reserve and a path to some of the coolest beach huts on the planet. On a wet winters day you meet plenty of people walking their dogs and some very hardy bird-watchers.

Great locations are nice but I could have chosen to do this walk almost anywhere in the country and it would have been possible to take interesting pictures. When I’m in London I often walk the canal toe-paths or wander through Epping Forest to see what I can see. Location isn’t as important as the attitude that “something is going to catch my eye”.

The wooden chalets that line the spit are all painted in different colours and no two are alike. What I had wanted to do here was to use flash to make one hut stand out even more from the rest and so I walked along until I saw a very nice one in a muted yellow.

The “normal” exposure here would have been 1/200th of a second at f5.6 on 200 ISO but the skies would have been washed out and I couldn’t achieve my self-set goal. The trick here was getting enough power from two Speedlights to give me a flash exposure of f11 so that I could let the background and sky go two f-stops under exposed.

I found this hut with something right next to it where I could hide a flash. Just along the beach was a freshly painted blue hut that had its own tuft of grass – which was perfect cover for a couple of speedlights. With two flash units simply sitting in plastic bags on the sand and on ¼ power each I played around with composition and with angling the two flashes at different angles before coming up with one of my favourite images of the day. The exposure was 1/200th at f14 on 200 ISO and that allowed me to pick out the single hut better because the flash units were so close to it. The rules of flash fall-off mean that if something is two metres from the light source, and perfectly exposed, anything else that is four metres away will be exactly two f-stops underexposed which plays directly into the hands of anyone being creative with light.

UK National Symposium on Photography 2012

The fourth National Symposium on Photography takes place this Friday, Saturday and Sunday in London. Timed to coincide with the World Photography Organisation Festival in London, the symposium will feature a very interesting range of debates and events.

I am going to be there, taking part in a panel debate about the future of news photography. The narrative for the debate on the UKNSP website says this:

The ethics of press and public photography, with particular reference to the implications of the Leveson Inquiry. At what stage does photography become harassment? Should there be controls? More broadly, where is the press heading in its use of photography? Should the press, citizen journalists, and members of the public all be treated the same or differently, whether in general or at newsworthy events? This panel discussion features a range of points of view – that of a photographer who gave evidence at the Leveson Enquiry, a leading picture editor and a champion of citizen photography.

It’s going to be a very interesting and maybe even passionate debate. This will be the third time in four years that I’ve taken part in the symposium and I firmly believe that it is developing into and very important event in the UK photography calendar. My fellow panellists are Alan Sparrow, Chairman of the Picture Editors Guild and Executive Picture Editor of Metro UK and Pauline Hadaway, Director of Belfast Exposed Photography and the debate will be chaired by Photographer Andrew Wiard.

The debate starts at 5pm on Friday 27th April at Somerset House in London. Tickets are available from Redeye or from the WPO.