commercial

The Photographers’ Summit 2017

screen-shot-2017-02-06-at-11-11-01

A graphical breakdown of the types of work that I do these days and where the images end up.

I do quite a few talks and lectures throughout the year and I don’t normally discuss the specifics here on the blog because they are rarely open to a general paying audience. This one is different. The National Union of Journalists here in the United Kingdom invited me to run a couple of one hour workshops at a very interesting event they are running in London this Saturday. Titled “The Photographers’ Summit 2017” the day includes the following:

  • Improve your videography skills.
  • Rights & restrictions: how privacy and property laws affect photographers & videographers.
  • Using copyright law to make sure you don’t get ripped off.
  • Moving from staff to freelance photographer.
  • Innovations in photography — 360degree filming and other developments.
  • New models and ways to make money.

The good news is that you don’t have to be a member of the NUJ to attend and it looks likely to be an interesting day. (more…)

First impressions of the EOS5D Mark IV wifi

5d4_close_up

The Canon EOS5D Mark IV – the first professional DSLR from Canon with a fully functioning wifi capacity built-in.

When Canon announced that they had added a wifi capability to the new EOS5D Mark IV I was simultaneously surprised, delighted and apprehensive – emotions which have in turn given way to a sense of relief. Wifi was a feature that many photographers had asked manufacturers to implement over a number of years and we had always been told that there were technical reasons why it couldn’t be done and that most buyers simply didn’t want it. The rise in popularity of limited wifi in consumer and ‘prosumer’ models told a different story and Canon did the right thing by including it in this latest release.

The surprise element came because very few of the rumours that preceded the announcement of the Mark IV mentioned wifi at all. A lot of those people awaiting the new camera had resigned themselves to another generation of cameras with bolt-on accessories to handle rapid image transmission. (more…)

Getting pictures away quickly

Getting photographs to the client has always been one of the less glamorous aspects of being a professional photographer. From sticking a pile of prints into an envelope and handing them to a courier to scanning negatives before using clunky slow modems to deliver them right up until today’s relatively painless methods nobody in their right mind would list this part of the process as either satisfying or easy.

The arrival of social media and the realisation amongst better clients that using our work rather than their own smartphone snaps has meant that we have had to speed things up a lot. I’ve always liked Eye-Fi cards but more recently I have been working with clients and with projects where something even more reliable and configurable is required. The worst part of it is that there isn’t actually one simple solution or workflow that will satisfy all of them in all circumstances. For a lot of jobs transferring the pictures from the camera to a smartphone or tablet before captioning and shifting them to the client is quick enough and I’ve written about that workflow before. New software appears all of the time and I am always looking at ways to make things smarter and quicker by introducing some automation and cutting steps out.

Live Ingest window from Photo Mechanic 5.

Live Ingest window from Photo Mechanic 5.

(more…)

If you haven’t seen Pixelrights – check it out…

pixelrigts_ss
When friends of yours start up a new business it is natural to wish it well and then forget all about it until you see those friends again. That’s kind of what happened with me and Pixelrights. Shaun Curry, one of the founders is an old mate and when he rang me out of the blue a while ago to explain his new business venture I was happy for him and offered my support as I would with pretty much any of my friends.

A few months later Shaun got back to me and asked to ‘borrow’ a couple of pictures for their development website. Always happy to help I sent him a couple of JPEGs and signed up for email, Facebook and Twitter feeds to remain abreast of their progress. Once more, nothing much happened and then Pixelrights offered to develop the new website for The BPPA and suddenly there I was having an in depth explanation of their ideas complete with a demonstration of what their idea could offer.

Passive supporter becomes active advocate over the course of one afternoon. I love the idea and I really love the fact that these are people doing what they are doing for money AND for the love of what they might achieve. So what is Pixelrights? Here’s a cut and paste from their own concept page:

Working in photography and the visual arts ourselves, we wanted to create something that we would not only use, but also enjoy using. We saw the need for simple, functional yet sophisticated portfolios which would serve photographer’s interests and needs, in an honest manner with no marketing trickery.

Pixelrights provides a secure, simple, classically-presented choice of website designs, backed up with state-of-the-art technology, all for a single price. There are no hidden charges to remove branding, no divisive price plans and no subscription fee traps.

What it actually provides is a portfolio of the simplest form with good image protection and the option to allow carefully controlled and monitored sharing. There are quite a few design options and there will probably be more by the time the current “Beta” phase is completed. I have three folios on my pages and I have a range of hidden galleries which are invite only so that clients can go and look at images that I have uploaded for them to Dropbox making use of a cool and simple interface. The whole point of a beta phase is to gather opinions of users and make things even better and that’s exactly what is happening.

I’d strongly recommend that you go and check out Pixelrights for yourself and the best way to get there is via my members page. Make sure that you look at the features and the pricing because this is a good idea from good people with an awful lot of backing from working photographers.

Electrical safety for UK photographers

Most of us use some sort of mains powered gear and most of us fly with our equipment from time to time. The law regarding what you have to do to comply with the rules around safety of the gear can make pretty good bedtime reading – if you need to go to sleep quickly. Portable Appliance Testing or PAT for short is the stuff of myth and legend and here are a few key points that photographers should be aware of gleaned from the UK Health & Safety Executive’s many handouts on the subject.

Portable Appliance Testing (PAT)

Portable appliance testing (PAT) is the term used to describe the examination of electrical appliances and equipment to ensure they are safe to use. Most electrical safety defects can be found by visual examination but some types of defect can only be found by testing. However, it is essential to understand that visual examination is an essential part of the process because some types of electrical safety defect can’t be detected by testing alone.cutouts

A relatively brief user check (based upon simple training and perhaps assisted by the use of a brief checklist) can be a very useful part of any electrical maintenance regime. However, more formal visual inspection and testing by a competent person may also be required at appropriate intervals, depending upon the type of equipment and the environment in which it is used.

Electricity at Work Regulations 1989

These require that any electrical equipment that has the potential to cause injury is maintained in a safe condition. However, the Regulations do not specify what needs to be done, by whom or how frequently (ie they don’t make inspection or testing of electrical appliances a legal requirement, nor do they make it a legal requirement to undertake this annually).

The frequency of inspection and testing depends upon the type of equipment and the environment it is used in. For example, a power tool used on a construction site should be examined more frequently than a lamp in a hotel bedroom.

So what does this actually mean for photographic equipment? Cameras are not covered by PAT but the batteries and chargers are. Batteries used in 99% of cases are contained and sealed and therefore should only require a visual inspection. Damaged terminals or cracked casings can mean that equipment is not safe and the item should either be disposed of or inspected by an approved repair centre.

Please remember that all batteries now have to be disposed of under the Waste Electrical and Electronic Equipment (WEEE) and Restriction of Hazardous Substances in electrical and electronic equipment (RoHS) directives aim to reduce he quantity of waste from electrical and electronic and increase its re-use, recovery and recycling. The RoHS directive aims to limit the environmental impact of electrical and electronic equipment when it reached the end of its life. It does this by minimising the hazardous substances of legislation controlling hazardous substances in electrical equipment across the community.

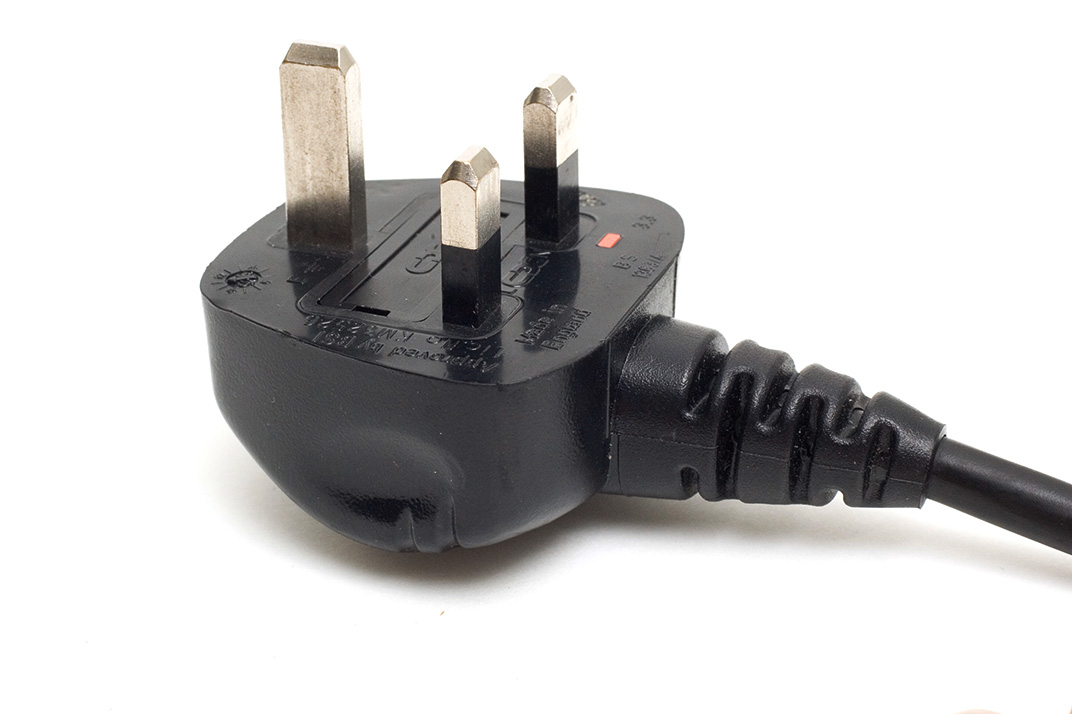
PAT covers all cables and all electronic equipment rated at over 40Watts – which means pretty much everything that we use. The cables, leads and plugs connected to class 1 equipment (everything we use apart from lighting) should be checked visually for damage, breaks and past repairs on a regular basis and should be checked properly on a cycle of between 6 months and 4 years depending on exactly what it is. In practice that means every six months for cables and every year for power adapters, extension leads and battery chargers. Heavy duty batteries and mains powered lights should be professionally tested at least every two years and more regularly if they are subject to heavy use.

Travelling with batteries

The International Air Transport Association (IATA) in association with the International Civil Aviation Organisation (ICAO) and the United Nations (UN) set clearly defined rules regarding the air transportation of Li-Ion batteries.

From January 1st 2012, the 53rd Edition of the IATA Dangerous Goods Regulations requires the independent testing of each type of Li-Ion battery, not just the individual cells, to ensure that the design and construction are compliant with the stringent United Nations regulations. This is a costly process for the manufacturer, but it should assure you, the customer, that the battery design is safe and of the highest possible professional standard. You should check with the manufacturer  of each type of cell whether they comply with the regulations before you travel by air or on certain rail journeys which feature long tunnels.

  • Check-in of Li-Ion batteries is not allowed unless the battery is attached to the camera or the equipment it powers
  • An individual may take on-board, in hand luggage, an unlimited number of Li-Ion batteries that have capacities of 100Wh or less.
  • Li-Ion batteries that have capacities greater than 100Wh, but less than 160Wh, are restricted to 2 items per person, in hand luggage.
  • Li-Ion batteries that have capacities greater than 160Wh cannot be taken as hand luggage or checked-in under any circumstances.

Where does the work come from?

It has been a little while since I last posted on this blog; apologies for this but sometimes life gets in the way of blogging! Anyway, I thought that those who are interested in the business side of photography might be interested in something that came into my thinking on a long drive back from a job listening to a business programme on BBC radio. When I got home I produced a couple of reports from my invoices using the wonderful Billings Pro application on my Mac. The one that caught my eye was one that gave me the raw data to work out how the bulk of my work (based on turnover) in the last six years as a freelance has come in.

Conventional wisdom says that a photographer gets out there with their folio after making cold calls and arranging appointments with potential clients. When I say ‘conventional wisdom’ I mean ‘what they taught me in college’. It is the classic sales tactic: research potential customers, show them what you have to offer and then (hopefully) close the deal at a mutually acceptable price. 99% of photographers and probably 88% or all businesses will probably tell you that it is neither that simple or that straightforward.

I started by working out some categories for the way I have initially got the work:

  • Cold calling and portfolio viewings
  • People finding me via the web
  • Referrals from family and friends outside the photography business
  • Referrals from other photographers
  • From colleagues I knew before going freelance
  • Sub-contracted work via other photographers
  • Other odd sources

I then quickly added up how much work (monetary value) each of those six sections accounted for and got the following results:

monetary_value


The monetary value for each client is based on that initial method of contact. Some high value clients have been very loyal to me and I hope that I have, in turn, given them the photographs that they need to keep those excellent two-way relationships going. On the flip side, most of the work that has come via the web has been one-off jobs for clients who don’t have a lot of work to commission.

Now I don’t know about you, but I found that to be quite a shocking set of results. Only 5% of my income has been generated by getting out there and trying to make sales in what you would call a ‘traditional’ way yet more than twice that figure came from referrals from other photographers. The sub-contract figure at 27% is also a lot higher than I thought that it would be but the biggest surprise is how low the figure for income generated via work from pre-freelancing colleagues. In my first year as a freelance that figure was considerably higher but it has been eclipsed by the friends and family percentage which, at 44%, is somewhat higher than I would have thought. People finding me through the web includes not only those who have found my website through searches but also the various social media platforms that we all spend so much time working on – 4% isn’t a great return on all of that effort either.

If I had the time, I’d like to work out how different the chart would be if I based the figures on the amount of time spent on the jobs rather than the money invoiced. My strong suspicion is that the cold calling and portfolio section would be a fair bit bigger as would the one for pre-freelancing colleagues because those are both news and editorial biased sections whereas the friends and family one is far more corporate and commercial.

So what conclusion should I draw from this? Maybe I should spend less time trying to generate work from cold-calling and spend a lot more time with family and friends? I suspect that the true answer is that I need to change my targets for the cold calling to more corporate and commercial ones simply because they have a higher value per job.

Portfolio updates – finally!

©Neil Turner/TSL February 2003. Gordon Ramsay photographed in his kitchen

©Neil Turner/TSL February 2003. Gordon Ramsay photographed in his kitchen

I have just finished uploading a major update to my website with a refreshed selection of new and old images in the portfolio section and an updated look to the templates pages with links to all of my social media.

I still do most of the work on my site myself and so it takes a lot longer to do but I am very happy with the way that photographs look on my site and I guess that is a major selling point. There will be lots more changes over the next couple of weeks but I’d like to invite you come to the site and have a look at the new portraits selection as well as two new galleries of personal work which will definitely be updated as they are both about continuing passions of mine.

My website is www.dg28.com and if you have any feedback, I’d love to hear it.

Eye-Fi card workflow

eye-fi_cards When I was rounding up 2013 I mentioned that I had a lot of success using an Eye-Fi card to wirelessly transmit pictures from my cameras (Canon EOS5D MkIII and Fujifilm X20) to either my iPhone, iPad or laptop where I can do a quick edit and caption before sending them to clients. Inevitably I got a couple of emails using the “ask me anything” feature of this blog asking me to describe my workflow. It is similar between an EOS5D MkIII and the Fujifilm X20 except that the former has twin card slots (one CF compact flash and one SD secure digital) whereas the latter only has the SD slot. I like to shoot RAW which means that in the X20 I have to do an in-camera RAW conversion to create a Jpeg to send out. I have two cards (shown left) – an Eye-Fi branded 8Gb Pro X2 and a Sandisk branded 4Gb one. In practice, they both do much the same job but the orange Eye-Fi one has more options should you want to work differently. Without further ado, here is how it all works on the Canon…

Getting the the settings on the card, your camera and your phone/tablet/computer right is the key to getting everything working well:

  1. Setting up the Eye-Fi card. When you get the card it should come with an SD card reader and by far the best way to set things up is to use that reader to load the card into a computer. There are lots of options that will appear once you have loaded the supplied “Eye-Fi Centre” application. This workflow is all about working in what the manufacturer calls “direct mode”. I choose to only transfer the files I want to my iPhone and so on the card I have selected “Selective Transfer” via the Eye-Fi Centre application. This means that only images that I have protected in the camera menu get transferred. On the Canon I have assigned the “rate” button to protect images for speed. It is also useful to add a couple of wifi networks and to define which file formats to transfer using the application whilst the card is in the computer because it isn’t possible to alter some settings once the card is in the camera. This whole process takes a few minutes and if you get it right, the whole thing test a lot easier from here on in.eye-fi_screenshot
  2. Setting up the camera. In the EOS5D MkIII menu there are three things that I’d recommend you do. The first is to assign the “rate” button to protect selected images. The second is to get the camera to write RAW files to the CF card and medium size Jpegs to the SD (Eye-Fi) card. Finally, you need to enable Eye-Fi transfer from the camera menu. This way you can use the review function with card 2 (the SD slot) and then every time you protect an image written to the Eye-Fi card it will automatically look to transfer that file to the device you have nominated.
    eos_screens
  3. The receiving device. I use an iPhone and an iPad and the whole process is eventually controlled by the free app that Eye-Fi make available through the Apple App Store. There are equally useful apps available for Android powered devices and the functionality is pretty much identical. Apart from loading the app the only other thing you have to do is to download and authorise a small change to your wifi settings on your phone which simply installs the settings for the direct mode to work. Once you launch the app you get an opening window which then gives way to the gallery window which in turn tells you what is happening about transfers. Below you can see the card paring screen and the gallery screen.eye_fi_phone
  4. Editing your pictures. Once you have the image on your phone or tablet you can then use the apps of your choice to edit and caption your image before shifting them on. My personal favourite is Photogene4 which has some good image options such as clarity, contrast, saturation, straighten, crop, sharpen and the ability to add IPTC captions – including defaults such as the EXIF time day and date as well as any pre-loaded captions and copyright information. I find that it’s a good idea to write some generic captions using Apple’s Notes app and then copy and paste them into Photogene4. The app also has the option to upload to a wide range of sharing sites as well as to email and ransomer images to FTP servers – making it really useful for work.photogene
    From shooting a frame to having it uploaded to my own FTP server normally takes twenty to thirty seconds if there is a good phone signal and the various uses that I’ve found for this rapid upload range from offering images to people I’ve photographed to providing almost instant pictures for corporate clients to use for their Facebook, Instagram and Twitter feeds at events. This is a very versatile piece of kit and I haven’t even come close to describing everything that it can do. I like the way that this workflow actually does flow and I love the effect that it has had on a couple of clients who really appreciate what it offers them. My first Eye-Fi card was £24.99 including VAT – possibly the best investment that I’ve ever made!